


Ok, so the next step was to plow a groove in the front, back, and sides for the bottom of the tool chest to fit into. Ideally, one would
 probably do this with a plow plane but since I don't currently own one, I chose an alternative process.
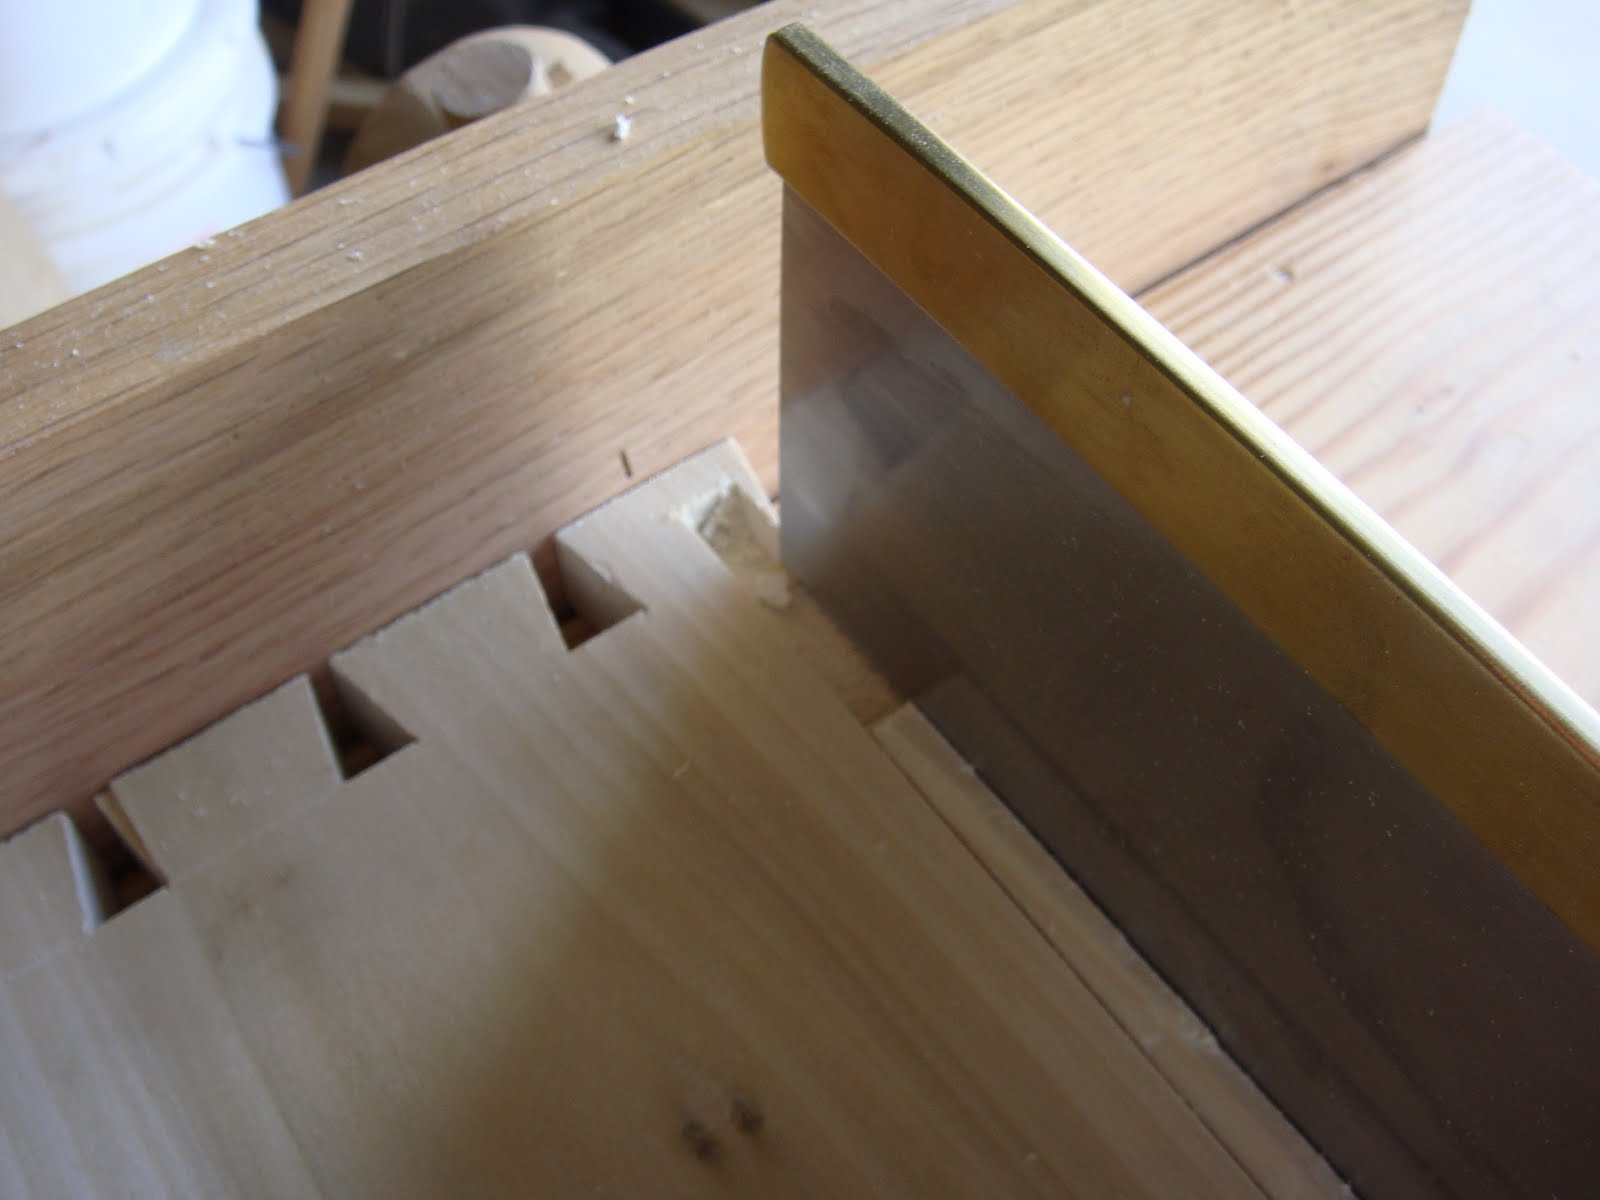
 The first step was to lay out where I wanted the grove to be. The bottom will be 3/4" thick boards with a 3/8" thick rabbet on the ends and edges to fit into the grove, so I took my marking gauge (don't currently own a mortice gauge either) and set it to 3/4" and marked a line up from the bottom of all four sides of the chest. I then reset the gauge to 3/8" and ran another line parallel to the first. I deepened these lines straight down with a striking knife and then came back with a chisel on the waist side of each line and made a little groove; a place for the saw to ride in during the next step.
Time to saw the sides of each groove. For this I used a small tenon saw filed crosscut. On the end boards, I was able to saw all the way across to a depth of about 3/8". This measurement is not absolutely critical. On the front and back boards, my saw cuts had to stop short of each end by about 3/8" or you would see a 3/8" x 3/8" square hole on each end of the chest when assembled. To make these stopped cuts, and the give the saw dust a place to go, I chopped mortices in each end of the board within the lines cut for the grooves. These only had to be about 2" long or so. Just enough to give the saw clearance at the start and finish of each stroke. Once these cuts reached the 3/8" depth, it was time to remove the material in between. The best way to do this is with a chisel.
I took a 3/8" bench chisel and started at an end closest to a mortice with the chisel held bevel down at about a 30* angle of attack. Tap the chisel with a mallet until you get near the 3/8" depth and then flatten out the angle. This is why you want to use the chisel bevel down. Do this down the length of the groove isn about 2" chunks until you reach the end. Then come back with the same chisel, held bevel down, and pare the bottom of the groove flat. This is the first time I've used this method and it gave me surprisingly good results. It's actually pretty satisfying to do things with minimal tools and have them turn out well. . . . . . . . .but I still really want that Clark and Williams plow plane. :) More to come.
2 comments:
Hey Jamie, This really is a great project you've got going here and I love the incentive you have! Nothing like a goal and a deadline to get you moving.
I lament my lack of plow plane too, but it's fun to realize the other ways you have to create the same effect. Lately my method to solve this issue has been to use a marking gauge and score very deep, just like you did, and then use a No. 71 1/2 router plane with a fence attached and a 1/4 blade.
Keep up the good work, we all wanna see more!!
Oldwolf
Hey Derek. Thanks! There is definitely something cool about building things with only a few basic tools. It somehow makes me feel like more of a craftsman to make things with the fewest tools possible.
I feel I may be building another tool chest soon. I'm afraid I may have built this one too large to be portable. But I'll find out soon enough. The size you have pictured in your latest post looks like a bettter size for portability.
Fantastic job on your carving by the way!
Jamie
Post a Comment