Sunday, March 25, 2012

Shop Update: Roof is On

Well, we were able to get the shingles on the roof between Thursday afternoon and Friday morning. Wanted to get it buttoned up before the rain moved in on Friday night and we did. First time I've ever done a roof this steep and I'm glad it was only six squares. That was plenty for me. And if I'm still around when it needs re-shingling, I'll be hiring someone for that job. :) I can't believe how hot the roof got by the time we got off it Friday, and it wasn't even quite noon yet. Would've never thought I'd have to worry about shingles being to hot to be on in March. Just goes to show how crazy the weather's been this year and the mild winter we had.

We also got the rest of the OSB on and got the 2x6 facia boards up. Next step is installing windows and doors. Starting to look like something now.

Tuesday, March 20, 2012

Out of the Fog....

....rises a shop. This is what the shop looks like after two days work by my cousin Troy and I. I'm very pleased with how far we got in just 2 days. Getting the rafters up and some plywood on the roof, it's really starting to take shape now. That's a 14/12 pitch on there; pretty darn steep. Whenever Troy gets a call while we're working, he tells the caller he's "here working on the church steeple." That steep roof is gonna help give me the look I want though, and will give quite a bit of storage up there. Hoping for good weather this weekend so we can get back on it.


Friday, March 16, 2012

Shop Build Update: A Fine Box

After my little foray into masonry, today was day one of the carpentry portion of my shop build. My cousin Troy, who was the brains behind my house build 12 years ago, showed up around 8 this morning to get started on laying out some floor joist. He's a plumber by trade but one hell of a carpenter. Seven hours later, with just him and I, we had built what he deemed "A nice box". I was really pleased with getting this much done on day one. You'll probably notice from the pictures the absence of windows. There WILL be windows, I'm just having a hard time locating the kind I'm looking for at a reasonable price. We'll come back and cut and frame the rough openings for them when I find something suitable. I decided to put the front and back door on the same end of the shop to keep the "wasted" wall space in one area. A stairway/loft ladder to the second story will be on that left hand wall between the doors.

Tomorrow, Jen and I are off to DC and Ford's Theater to see 1776. Should be a good show, and Ford's is always a nice place to see a play. If you haven't been there, I highly recommend it. On the way there, I plan to stop in the DC suburbs at a place called Community Forklift in hope of procuring some windows in the style I'm looking for. Supposedly they have lots of old doors and windows. I'm keeping my fingers crossed that I can find what I want.

We'll be back at it Sunday morning, weather permitting. Second story floor joist and roof rafters will be on the agenda. I'll be sure to eat my Wheaties that morning. The floor joist are Amish milled 2x10's of yellow pine. VERY HEAVY. I went with rough cut for these because I am going to forgo a finished ceiling on the first floor and leave it open with the pine beams and tongue and groove pine of the second story floor serving as the ceiling of the first. I think that'll be a good look. The first floor is getting that same tongue and groove pine also, after the shop is under roof. I just put down the 3/4 T&G OSB as a sub floor. Here's a few pics.


Sunday, March 11, 2012

I'm No Mason.....

.....But I faked it and got the footings of my shop finished this weekend. 42 bags of Quick-crete filling 6 holes and JUST enough left over brick from when I built my house 12 years ago did the trick.

Tomorrow I'll make a lumber order which will hopefully be delivered by Tuesday. AccuWeather is calling for a pretty nice week coming up here in southern Maryland. I think I feel a sick day coming on at some point this week. :)

The obligatory ceremonial ground breaking shot:


And some pics of the brick work. (actual brick masons, look away if you're squeamish)


Thanks to my laborers this weekend, my daughters Gillian and Casey.

More updates coming as progress warrants.

Monday, March 5, 2012

I Just Might Have a Saw Fetish

It's been a while since I posted anything about saws. November 17th to be exact. Since then, in between home improvements, I've managed to build two more brass backed saws to compliment the big tenon saw I made last Fall. Well, yesterday I decided to do a photo shoot of my sexy little triplets. Yes, I admit it's a little disturbing to find tools sexy, ( my wife would probably say take out the "little" part ) but I know I'm not the only one who feels this way about tools. Come on, admit it. And my wife's the one who bought me a new camera for Christmas so in a way, she's an enabler. Surely she knew I'd use it for my dirty little tool porn photo shoots. Anyway, enough foolishness, on to the pics. I fooled around a little on my iPhoto program trying to get some different looks. I'd really like to one day learn to properly photograph tools to eliminate glare and get studio quality looks.


A little about the saws:
The top one is a 14" cross-cut. 12 TPI, filed with 15degrees rake and 20 degrees fleam. Depth of cut is 2 7/8" under the back at the handle and 2 5/8" at the toe.
In the middle is a 16" tenon saw. This one is 11 TPI, filed rip with about 5 degrees of rake. It has a 3" depth of cut at the handle and 2 3/4" at the toe.
The bottom one is the 19" tenon saw I blogged about here. They all have beech handles finished with TruOil.
I'm really pleased with how these saws preform. So much so that I put my premium back saws up for sale on eBay. All except for my Wenzloff Early Kenyon dovetail saw. That is one sweet cutting saw, and at 20 TPI, a little finer toothed saw than I feel comfortable trying to build at this point.
My saws are longer and heavier than is typical for similarly toothed saws. I really like the extra length, and the weight of the heavy brass backs just make them eat through the wood. All I have to do is get them started on line and let the weight do the work. Not sure what it is about the length, but I think if you were to try a longer back saw and then switch back to a normal length one, you'd wonder what happened to the rest of the saw. I know that's how I felt when I used them and that's what pushed me to sell my old saws. I think I'll use the money I make from the sales to purchase the Gramercy saw vise, some saw files, some folded brass backs, and some 1095 spring steel. Yeah, I think I may have a saw problem. But I'm not really looking for a cure. :)

Thursday, February 23, 2012

My "Someday Shop" Update

Back in August of 2010, I wrote a blog post entitled " My Someday Shop". Well, the Financial Department (AKA, my lovely wife Jen) told me that if we made out ok on our tax returns this year, I should build my shop. Obviously I was on pins and needles as we sat getting our taxes done, watching the refund total switch back and forth from shop to no shop with every entry our tax lady typed in. Finally, the end result. Good enough to get the final go ahead. WOO HOO!!!
So, since then I've been drawing, designing, getting prices on material and asking everyone I know if they have any old windows lying around. Pretty sure I'm gonna go with a 15' x 20' shop and try to make it look as much as possible like the shoemaker's shop from my earlier post. I checked with one of the local Amish saw mills on lumber prices. Really no cheaper on the framing lumber than the home centers, but I was pleased with their price for 1 x pine T&G flooring. At $.65 a board foot, it's actually a little cheaper than 3/4 T&G ply and is WAY cooler than plywood. About a two week lead time, so I think I'm going to order that this Saturday.
I also stopped by our local Habitat for Humanity Restore spot and found a deal on two window sashes that I think I can use. They are actually top sashes out of a double hung window, but at $35 for the two of them, I can make them work. They're really nice Pella sashes, vinyl mullions on the outside and unfinished pine inside. Turned sideways, one of them will make a perfect large window over my work bench on the front wall, where the casement window is on the front of the shoemaker shop. I'll get plenty of natural light from this 52" wide x 37" tall beast. I'll probably put the other one on the back wall, maybe put a lathe under that one. Still time to think about all that. Gonna shoot for a start time of late March or so. Not sure I'll have enough money to totally complete the inside, but I'll at least get her weather tight and then I can finish the inside as money permits. I'll be posting my progress as I go. Needless to say, I'm pretty psyched!

Saturday, February 18, 2012

There's a Desk in Here Somewhere


....I just have to find it.

My wife's job is very demanding. Most days she works nine hours or more at the office and then comes home, eats dinner, and works another hour or two from home until it's time for her to go to bed. This being said, she loves her job. What she doesn't love is having two monitors, a docking station, her work lap-top, keyboard and mouse sitting on a folding table in the living room serving as her home desk. She hates clutter and she likes to have the house looking nice at all times. Her present work station doesn't fit in with that. That's where I come in.

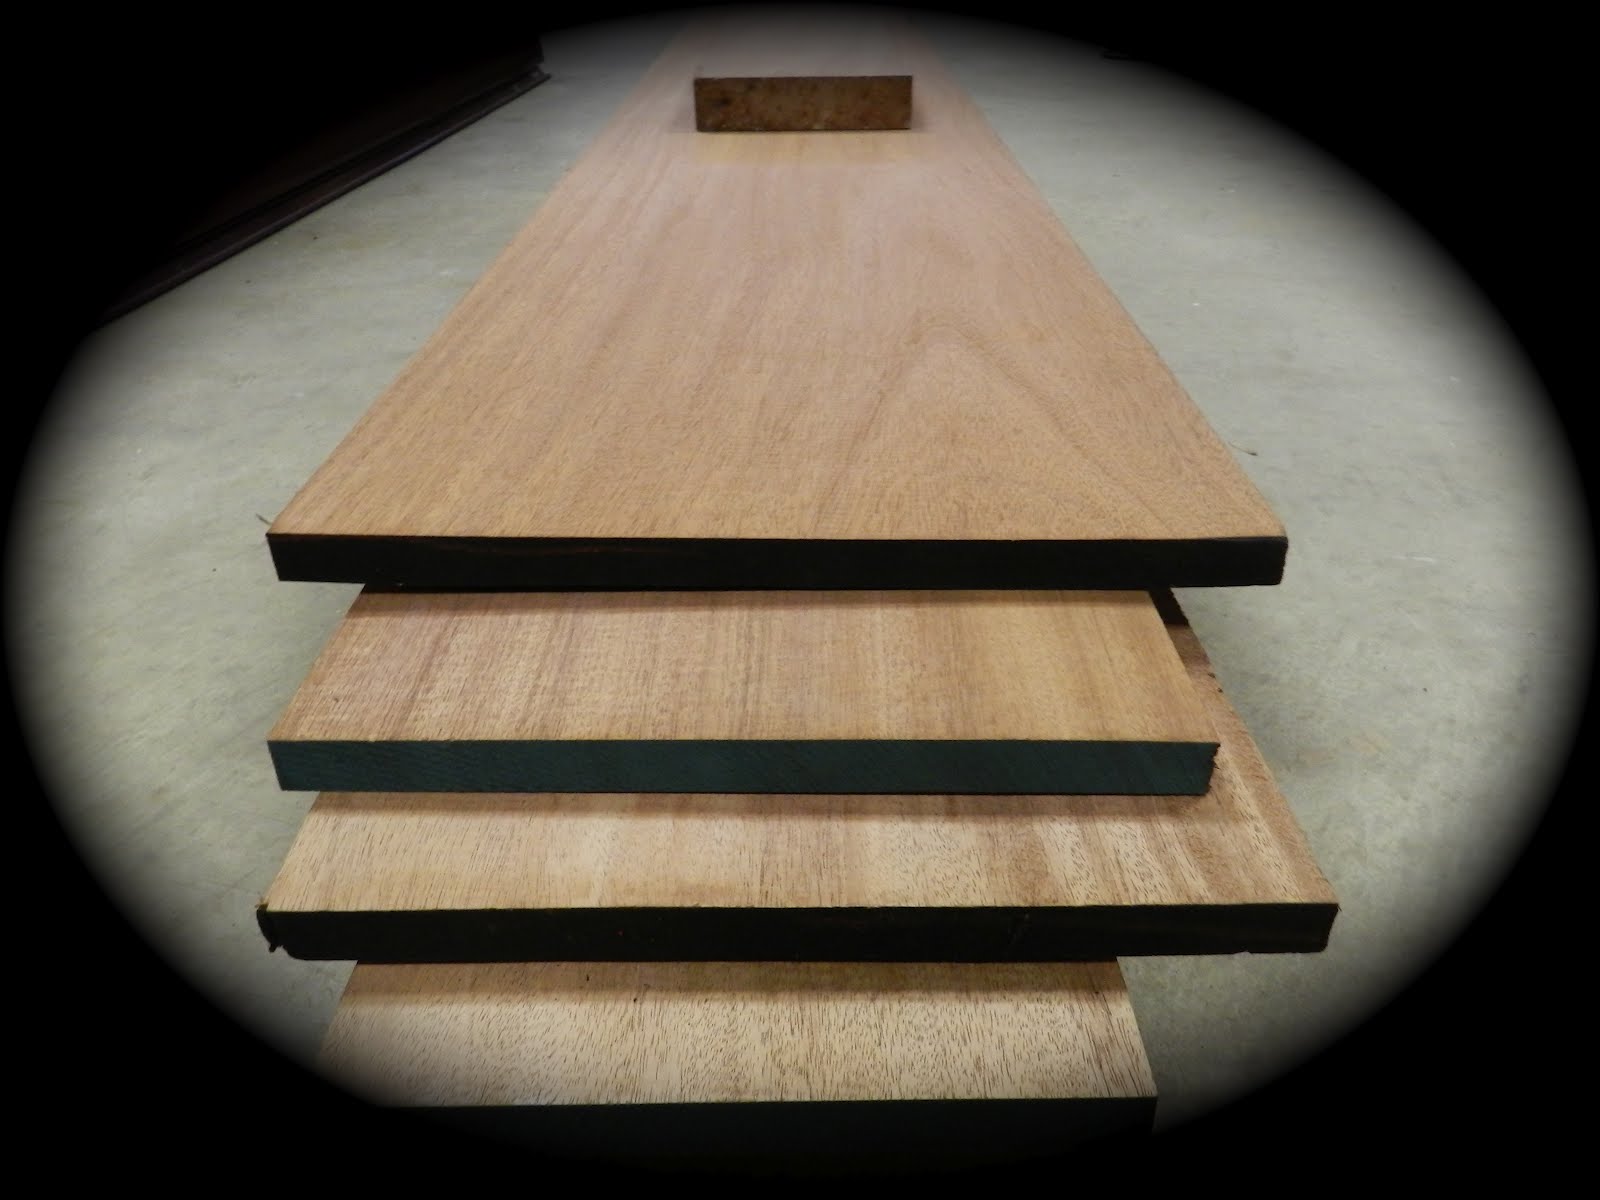
She has asked me to build her a desk. Somewhere she can work comfortably, but when she's done, be able to hide things behind closed doors for that neat, clean look she desires. So, after looking though a bunch of my furniture books and scouring the internet I came up with something we both like. It's a plantation desk, sized and modified to suit her specific needs. We decided on Walnut for the desk. I'm thinking 55 to 60 board feet of primary wood and just a few poplar boards as a secondary wood where I can get away with it. I had contacted a local hardware store/slash lumber company about the walnut and was told they just got in a fresh batch from Pennsylvania. When I got there and looked at the stack, I was pretty disappointed. Of all the 4/4 walnut, there was none that was over 6 inches wide. And they had no 8/4, which I was hoping to find to avoid a glue-up for the legs. That's when I spotted the mahogany. Beautifully clear, 15 foot long lengths, and none of it under 9 inches wide. I inquired about the price; same as the walnut. Surely there was a premium on the wide boards. Nope. Same price per board foot no matter how wide. There was even a piece 23 1/2 inches wide that I opted not to take. Needless to say, right then and there I switched from a walnut desk to a mahogany desk. All the wood I need is in five boards; four of them 4/4 x 15 feet long. The widths are; two 12 inch boards, one 9 inch, and one 13 1/2 inch. The fifth board is 8/4 for the legs. Almost 8 inches wide and 6 feet long. Enough for the legs for this desk and another table or desk down the road.


I've never worked mahogany before and I've never had the opportunity to work with such nice, wide stock. I'm very much looking forward to it. The only thing that I'll have to glue up on the whole piece it the desk top, and that will have only one glue joint. This is going to be strictly a hand tool only project and I can't wait to get started. I think I'll work out a cut list tonight to get the maximum yield and grain match out of my purchase. Much more on this desk to come as I get started on some actual woodworking.