Tuesday, May 31, 2011

It's here! It's here!


This was in my mailbox when I got home today.


Opened the box and saw this.


My long anticipated copy of Chris Schwarz new book The Anarchist Tool Chest. Can't wait to delve into this one!

Wednesday, May 25, 2011

Tool Chest Build Part 5, Coming Together

Well, I've had a few late evenings to work on the tool chest since my last blog entry and it's starting to come together now. I'm not going to have it completely done and painted before I leave for North Carolina and my class with Roy, but I hope with a couple more evenings to have it done enough to trasport some tools in. I'm going to shoot for getting the lid made tonight. Then I'll need handles, I'm thinking cleats with rope handles, and I think I want to put a skirt board around the bottom. Maybe a trim board just below the lid also. Then a nice coat of milk paint on the outside. But for now, I'm shooting for a lid and handles before I head south at some point on Friday. Wish me luck. :)
I'll try to take lots of pictures and do a report on my experience at The Woodwrights School when I get back.


Tuesday, May 17, 2011

Tool Chest Build Part 4, Shiplap Joints with a Rabbet Plane


So, on to the bottom for the chest. Based on the size lumber I had, I decided to run my boards for the bottom from front to back and rather than glue up a panel, I'm just going to let them float individually in the grooves of the sides of the chest. To keep gaps from opening up all the way through as the wood moves with the seasons, I chose to use shiplap joints where the edges of the board meet. These joints are pretty simple to execute, and with minimal tools. All I used was my marking gauge and a 1" square rabbet plane.
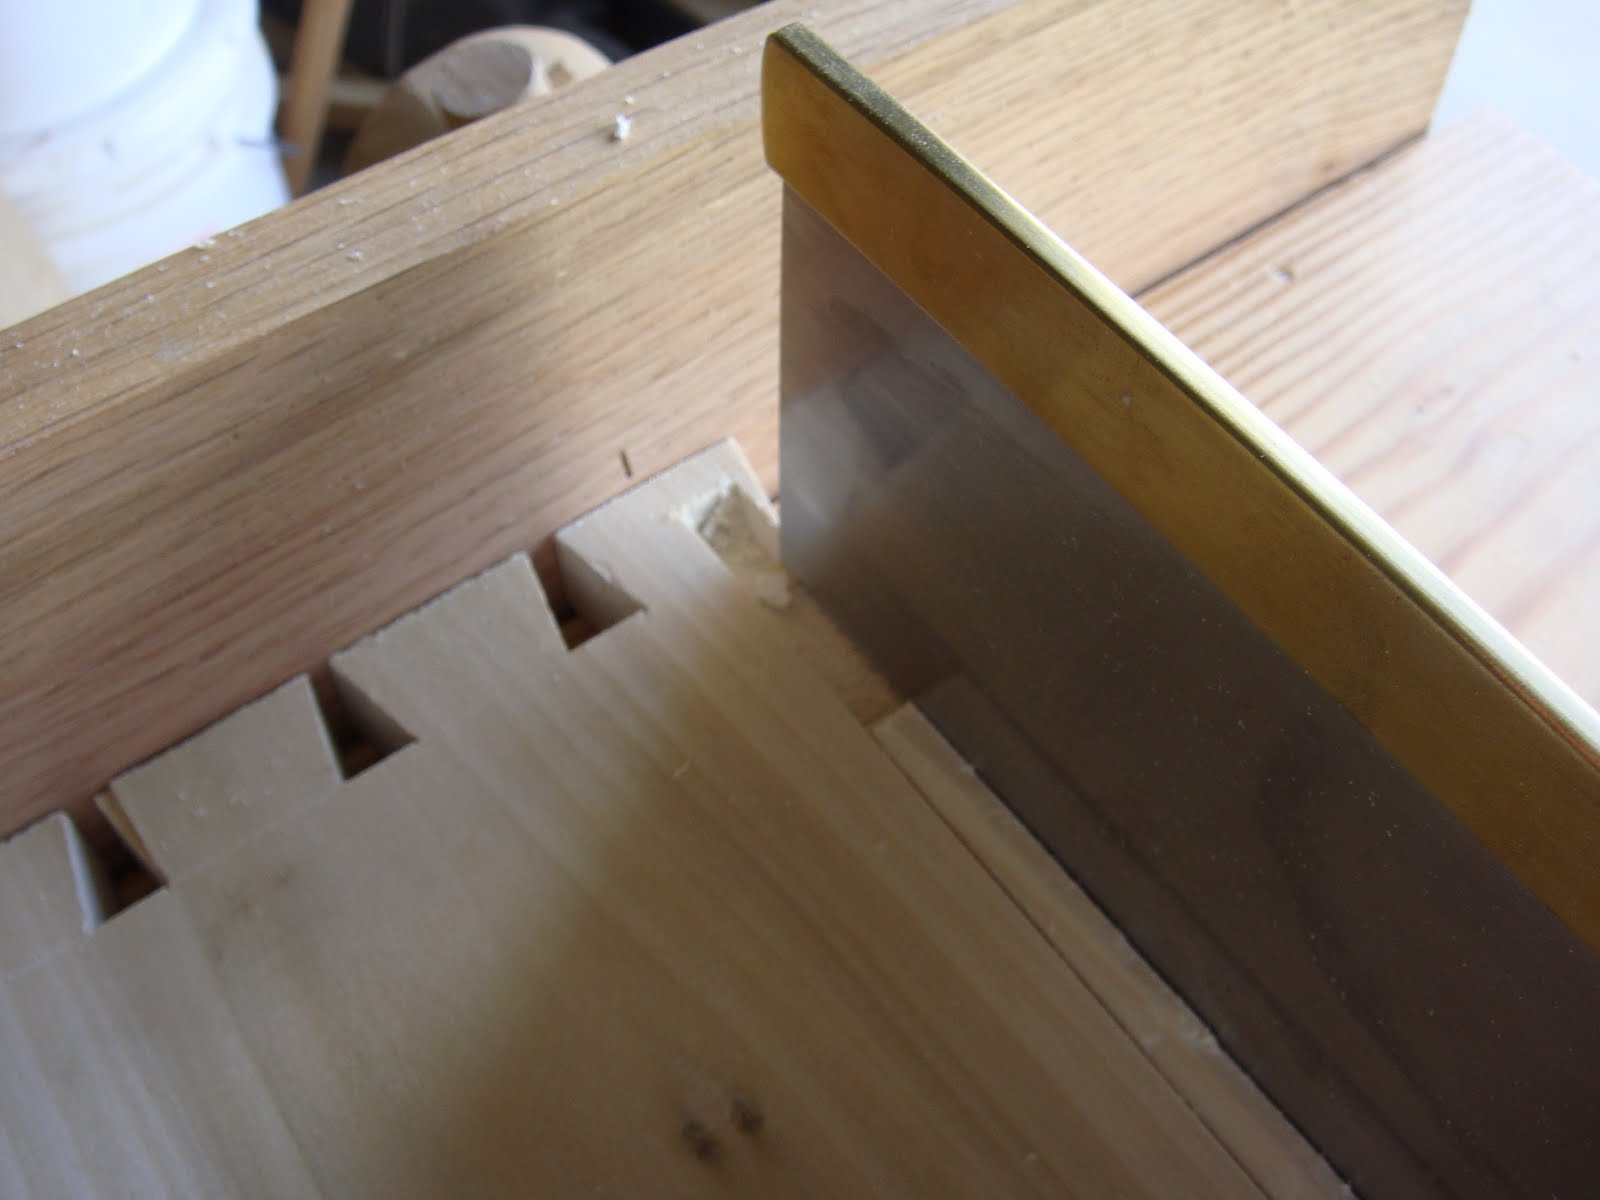
To start, I set my gauge to the desired setting, in this case 1/2", and ran a gauge line down the edge of the bottom boards, on top on one side, on bottom on the other side. Then I reset the gauge to 3/8", half the thickness of my boards, and ran these gauge lines on the edge of the 3/4" thickness. To start the rabbet, take your rabbet plane and tilt it toward the inside of the board so that just the corner of the iron rides in the gauge line made earlier on the face of the board, using the finger tips of your left hand to ride against the edge of the board and act as a fence. A couple of passes like this establishes a shoulder for the rabbet plane to ride against and the plane can now be straightened to 90* and run down the edge of the board until you reach the 3/8" depth gauge line. And that's pretty much all there is to it.
I have to admit, this is really the first time I've used a rabbet plane in a project and it's a great tool. Mine is one I happened to find on eBay about a month ago. When it came in I just inspected it and set it aside, not having an immediate use for it. Well last night I found a use. Sharpened the blade on a few different grits of oil stones for 5 minutes or so and that was all it took to have a wonderfully functioning plane. Nice tight mouth and all. This turned out to be a great find and I will be keeping my eyes open for more. The square blade rabbet planes are much tougher to find than the skewed, but I've heard they are better, and the performance of this one gave me no reason to doubt these claims.
Next step, a couple passes on all the pieces with the smooth plane and then some assembly.

Monday, May 16, 2011

Tool Chest Build Part 3, making grooves without a plow plane


Ok, so the next step was to plow a groove in the front, back, and sides for the bottom of the tool chest to fit into. Ideally, one would probably do this with a plow plane but since I don't currently own one, I chose an alternative process.
The first step was to lay out where I wanted the grove to be. The bottom will be 3/4" thick boards with a 3/8" thick rabbet on the ends and edges to fit into the grove, so I took my marking gauge (don't currently own a mortice gauge either) and set it to 3/4" and marked a line up from the bottom of all four sides of the chest. I then reset the gauge to 3/8" and ran another line parallel to the first. I deepened these lines straight down with a striking knife and then came back with a chisel on the waist side of each line and made a little groove; a place for the saw to ride in during the next step.
Time to saw the sides of each groove. For this I used a small tenon saw filed crosscut. On the end boards, I was able to saw all the way across to a depth of about 3/8". This measurement is not absolutely critical. On the front and back boards, my saw cuts had to stop short of each end by about 3/8" or you would see a 3/8" x 3/8" square hole on each end of the chest when assembled. To make these stopped cuts, and the give the saw dust a place to go, I chopped mortices in each end of the board within the lines cut for the grooves. These only had to be about 2" long or so. Just enough to give the saw clearance at the start and finish of each stroke. Once these cuts reached the 3/8" depth, it was time to remove the material in between. The best way to do this is with a chisel.
I took a 3/8" bench chisel and started at an end closest to a mortice with the chisel held bevel down at about a 30* angle of attack. Tap the chisel with a mallet until you get near the 3/8" depth and then flatten out the angle. This is why you want to use the chisel bevel down. Do this down the length of the groove isn about 2" chunks until you reach the end. Then come back with the same chisel, held bevel down, and pare the bottom of the groove flat. This is the first time I've used this method and it gave me surprisingly good results. It's actually pretty satisfying to do things with minimal tools and have them turn out well. . . . . . . . .but I still really want that Clark and Williams plow plane. :) More to come.

Sunday, May 15, 2011

Tool Chest Build Part 2, Dovetailing


Got the dovetails cut on the carcass. Cut the pins first, which was a first for me. Worked pretty well. Laid out the pins with a pair of dividers, also a first. I liked this method. I just laid out a half pin on each end of the board, then decided how wide I wanted my pins and tails to be, which determined how many pins and tails there would be. Then it was a matter of setting the dividers to what I thought the width should be and walking them across the board. A few adjustments of the dividers width and I was all set. You know your setting is right when you start a the edge of the board, on the narrow part of the half pin, and walk your dividers across the end of the pin board, and end up on the line you drew for the other half pin. Then to get the other side of the pins, you go back to the side of the board you just started from, and this time start the dividers on the line of the half pin. When you walk them across this time, you will end on the edge of the other side of the pin board. You then take your bevel gauge, set to the slope you want your dovetails to be, and draw lines for your pins at each first mark from the dividers with the gauge one direction, then at each second mark with your gauge in the other direction. Then it's just squaring down the face of the board, sawing to those lines, clearing out the waste with a coping saw, and paring them to final shape. Set this board on your tail board to mark the tails from the pins you just cut and cut and chisel the tails. If all goes well, they'll fit together off the saw. I had to pair about 5 or six pins down to get them to fit. They're not perfect, but they fit together well and are very strong.
Next is to plow the groove for the bottom board to fit in. I should have done this prior to dovetailing, but I got a little ahead of myself. I don't own a plow plane ( at least not until my lovely wife buys me that nice Clark and Williams plow plane and set of irons ;) ), so I'll be cutting my grooves with a carcass saw and chisels. I'll let you know how that worked out on my next post. Talk to you then!

Friday, May 13, 2011

Preparing for a woodworking class/Building a tool chest?

I am signed up for a one day Dovetailing/Mortice and Tenon class at The Woodwright's School on May 28th. I've been very much looking forward to this since I signed up 4 or 5 months ago. I think just getting to spend the day with Roy is worth the price of admission all by itself, let alone actually having him show you his methods.
With this class in mind, I thought that it would be nice to have a portable (ish) tool chest to take some of my tools that would be relevant to the class along with me to North Carolina. So, in about a two week time frame, I'm going to attempt to build a tool chest. I actually started on it a few nights ago and so far, just have gotten the panels glued up for the front, back, sides, and bottom, and have cut to size and squared up the front, back and side panels. Going to start dovetailing the carcass today. All this is being done with no machinery, just meat power. I'm REALLY trying to get rid of those tailed beast. I'll update and post pictures when I get something worth showing. Looks like the size is going to be 26" long x 16" wide x 14" tall. Larger than I'd originally planned. Hopefully this won't be too big to carry. We'll see. More to come soon.