Wednesday, August 10, 2011

Trying Out The New Forge


I'd gotten 2 chisel blanks ready for heat treating so it was time to give my new forge a try. I waited til dark and set everything up in the driveway outside the garage at the request of my wife. I tried to tell her I'd never blown up a house before, but I think she felt better with things outside. :) I was using MAP gas, which burns hotter than propane, with a plumber type torch tip. I got everything set up how I wanted it, turned on the torch and waited. And waited. And waited some more. After 20 minutes, it was pretty clear this wasn't working like it was supposed to. I decided the trouble might be the tip. After a little internet research, I went and picked up a new tip with a swirling flame that claimed to burn much hotter. What a difference. Within 3 to 4 minutes the inside of the forge was glowing red. I put the 1" chisel blank in the forge, turning it a few times, and within a few minutes, the blank was glowing a nice, bright orange color. I checked it with a magnet and it was non-magnetic for about 2 1/2" up from the bevel end. Plenty high enough so I stuck it back in the forge just long enough to get back the heat I'd lost checking it and then quenched it in oil. Cleaned the black of the blank and stuck it in the toaster oven at 375 for an hour and then turned my attention to the 3/4" blank. Same satisfying results. Very quick to get up to temp. I'd read somewhere that some people temper the blades for an hour or so, let them cool, then bring them back up the that 375 temp again for an hour. Not sure if this does any better than tempering once or not, but I did it anyway. When they were done in the oven, you could clearly see the nice straw color that came up 2" to 2 1/2" from the end.
I'm really happy with the way the forge preformed once I switched to the swirling flame tip. Once I get these two chisels cleaned up, sharpened, and handled, I'll try to get a few more blanks knocked out. I believe I have enough O-1 left for a 5/8" and 1/4" or a 1/2" and a 3/8". I feel pretty good about my heat treating set-up now. It's not the prettiest thing, but it does the job.


I think I scared the chisels into submission when I showed them what they were going to get if they didn't act right in the forge. A 500,000 BTU flame thrower, err, weed torch. Lucky for them it didn't come to that. I think my wife was thankful also. :)


Monday, August 8, 2011

Home Made, Low Tech "Forge"


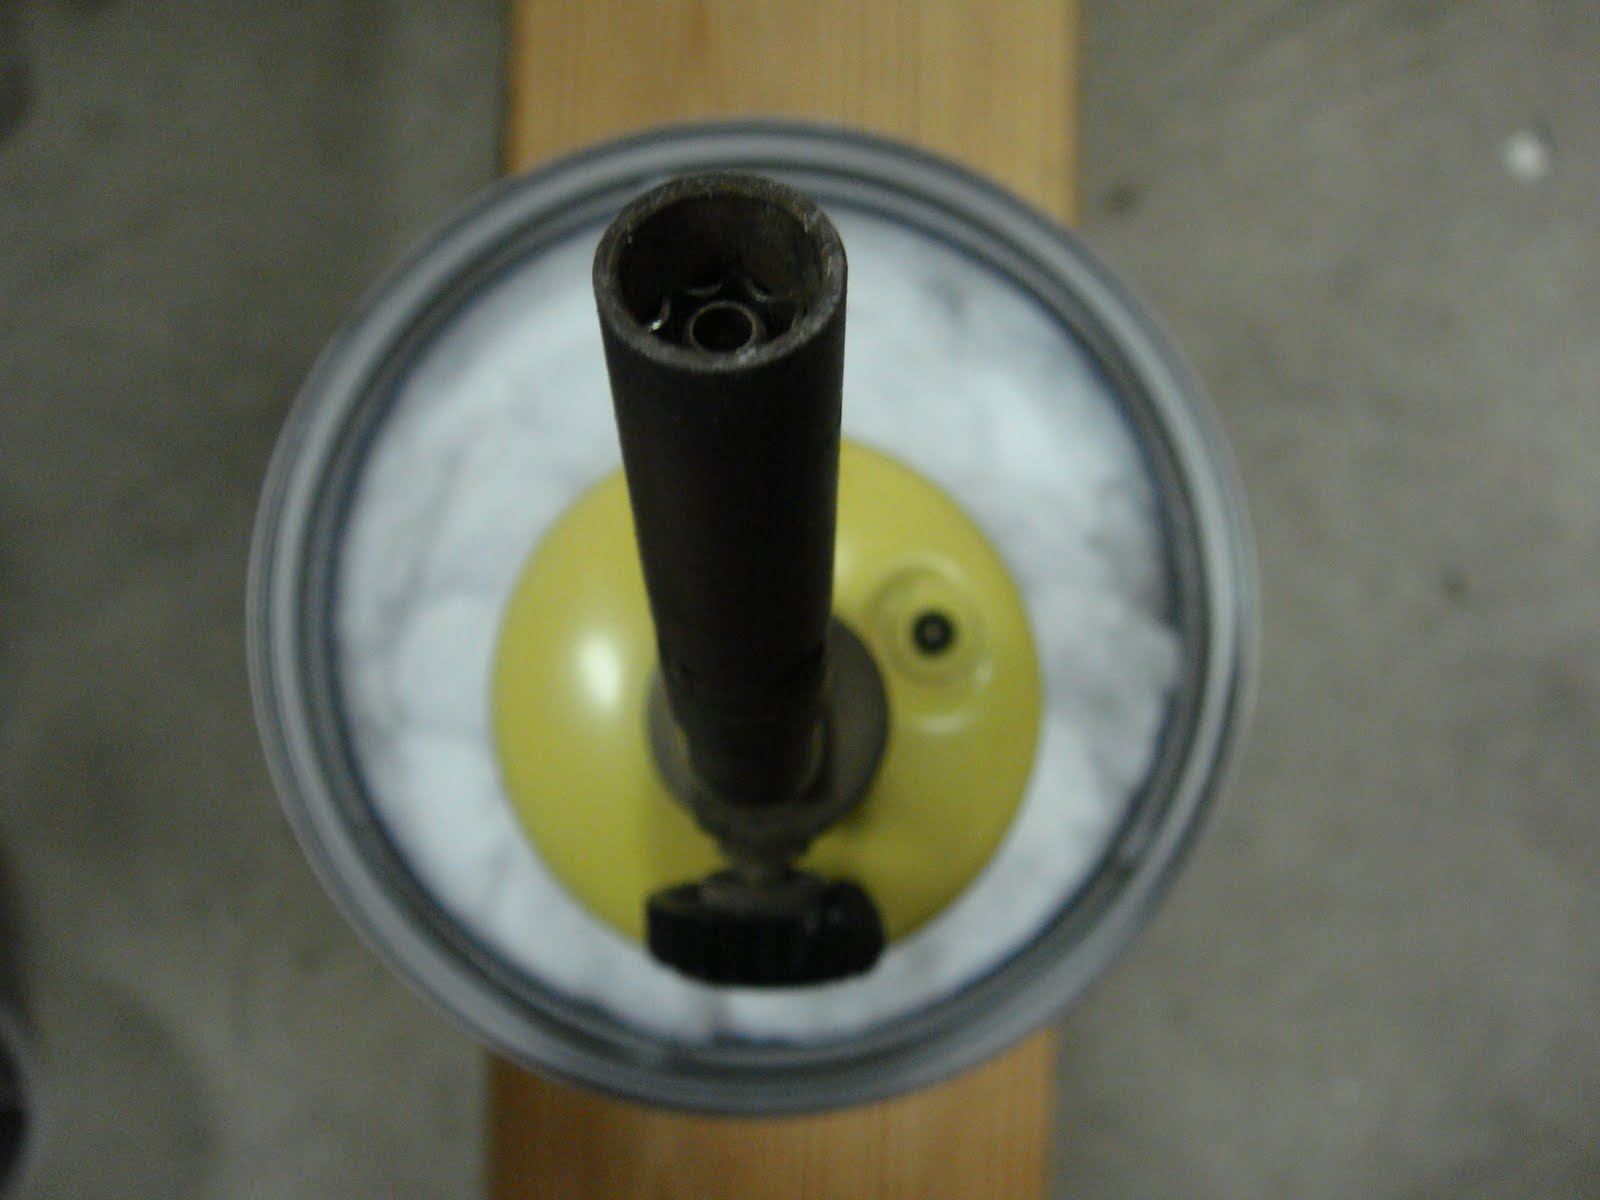
With this little chisel making project I've got going on, I thought that I should figure out a little better system of heat treating O-1 tool steel than just laying the steel on some fire bricks and holding a propane torch over it. I was able to heat treat my striking knives on a bed of charcoal, but that wasn't really ideal either. I did some internet research and found what looked to be the easiest, most economical solution to be a "paint can forge". I bought a new 1 gallon paint can from Lowes, and found the insulation and refractory cement at a wood stove store. I used a propane bottle to form the insulation around. Once that was packed in tight, I pulled the propane bottle out ( very important step :) ) and drilled a 1" hole for the flame to enter the forge. Then I slathered on a coat of refractory cement, let that dry, and applied a second coat, making sure to coat the opening for the flame also. Apparently this insulation is pretty nasty stuff and you don't want any of it exposed to flame. Next step; try her out and see if she works.

Monday, August 1, 2011

Making 18th Century Style Firmer Chisels: Getting Started

For a long time now, ever since I attended Colonial Willaimsburg's 18th Century Woodworking Symposium on the Tool Chest of Benjamin Seaton, and purchased the book by the same name, I have been fascinated by the beautiful tools inside that chest.
The chest was built in 1797 by a young Benjamin Seaton to house an extensive set of woodworking tools that his father purchased for him from Christopher Gabriel & Sons in London, England for his 21st birthday. What a birthday present! It was an impressive collection, featuring bench planes, moulding planes, 16 pairs of hollows and rounds, saws, chisels, gouges, and much, much more. After building the chest, Benjamin apparently, for whatever reason, never put the tools to work. He made a detailed inventory of the tools in the chest, and that inventory, along with a chest full of tools, is probably the most complete and pristine example of an 18th century cabinet makers inventory available to us.
What intrigued me most were the beautiful saws and the chisels. The chisels were unlike any available on the market today. Long, graceful looking chisels with square sides known as firmer chisels, not the bevel edged designs, tapering on their sides to almost nothing, that are so popular today. Since the day I saw the pictures of these chisels in the book, I've wanted some. To see how they work and just because I love the beauty of them. I can't find chisels like these, and if I could, I'm sure I couldn't afford them. So I decided to try to make a few.
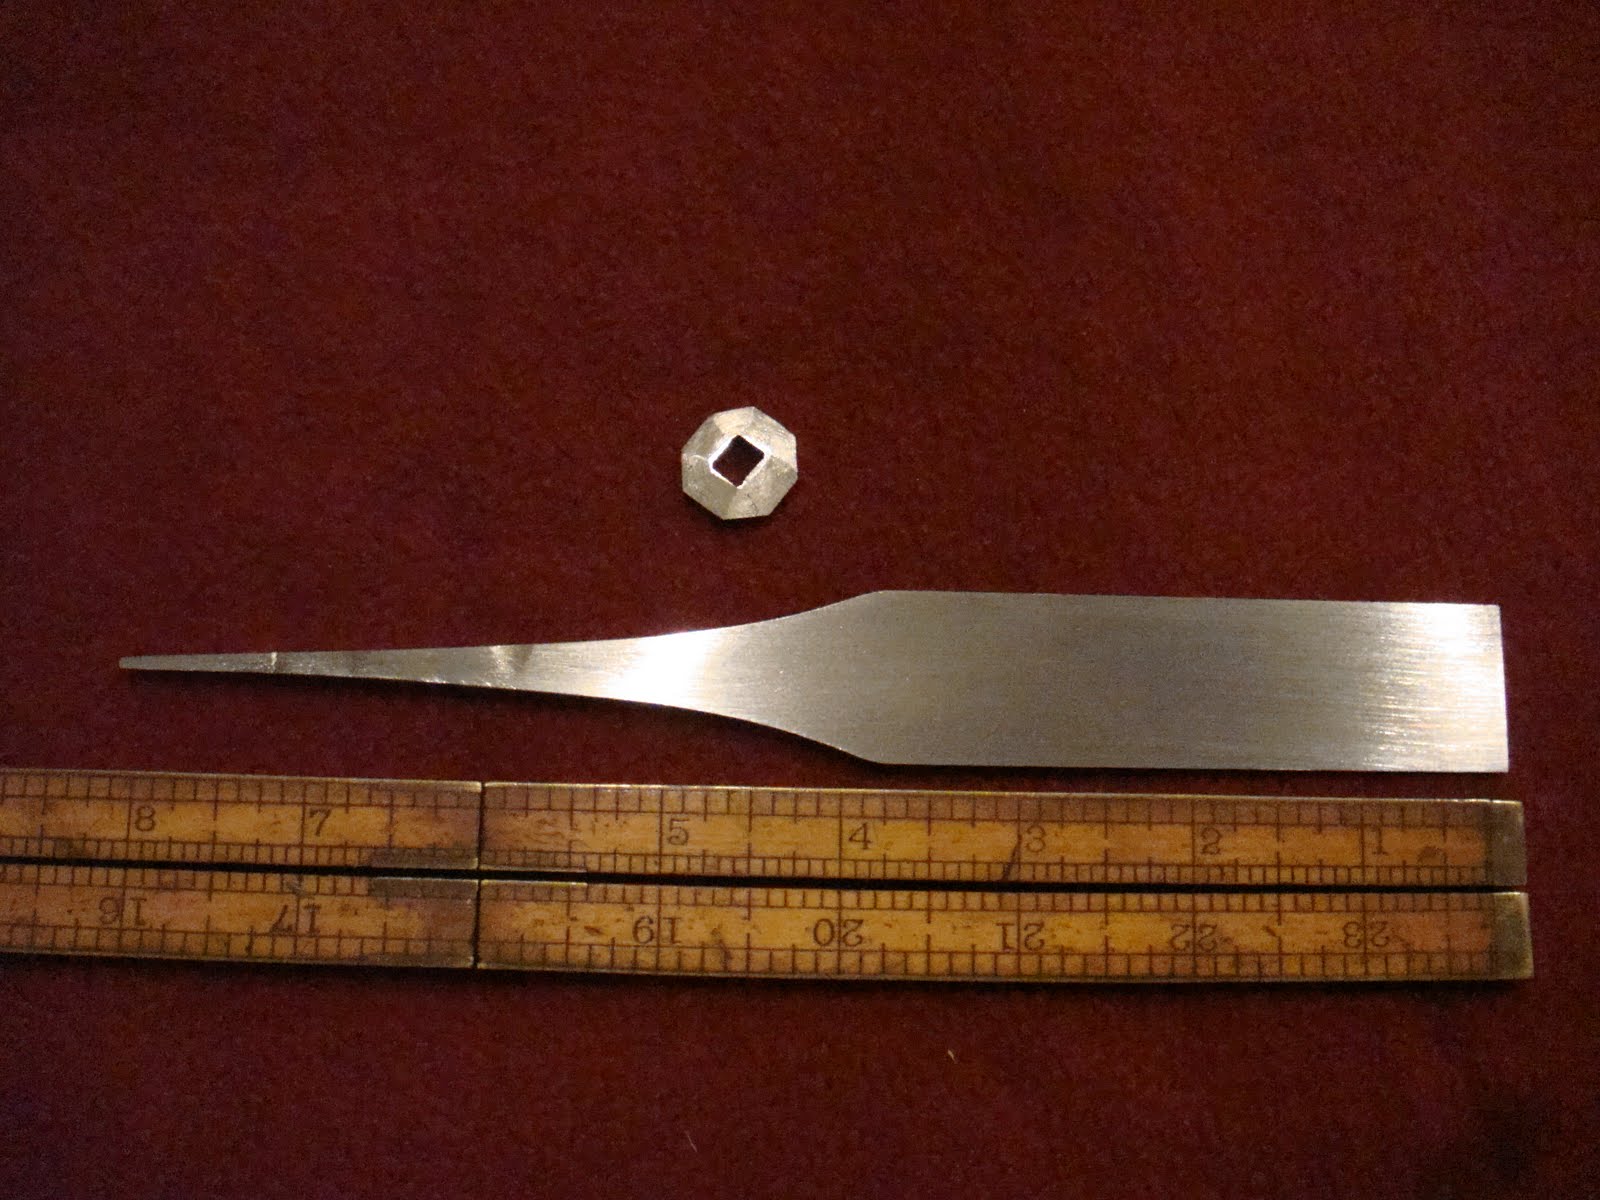
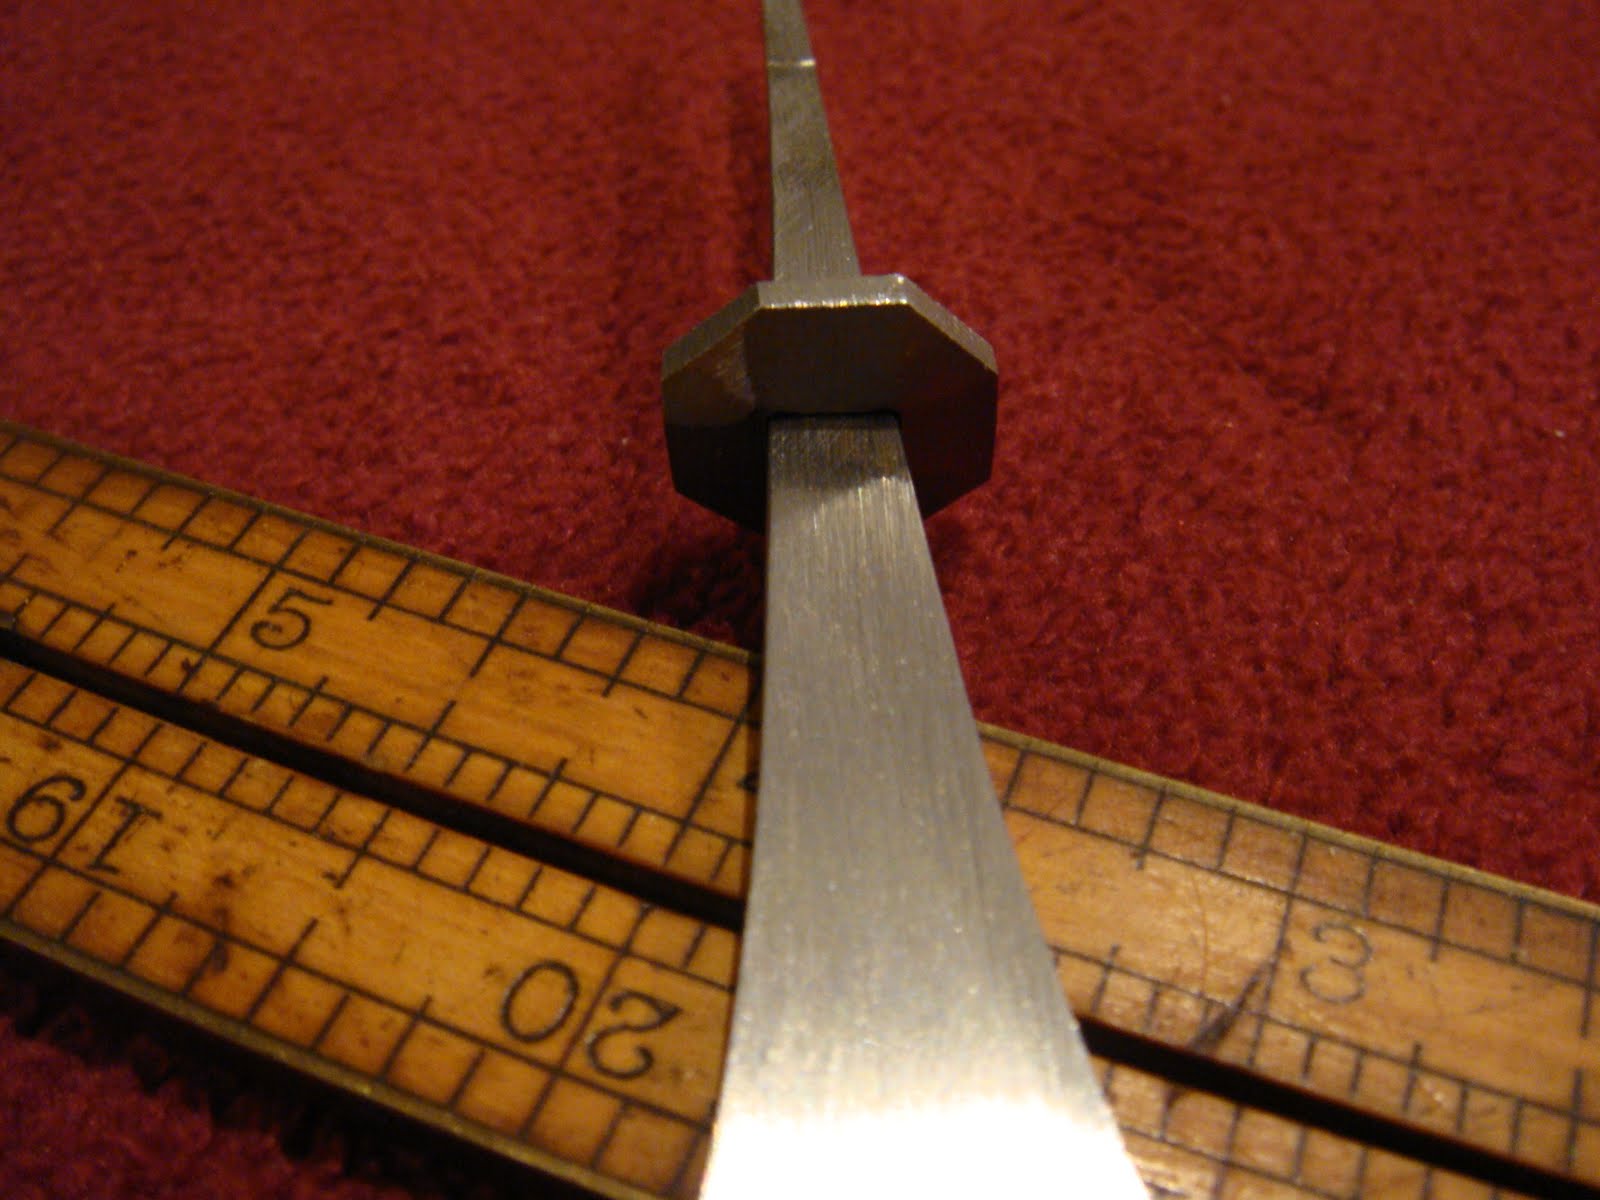
Time for a little detective work. The book, The Tool Chest of Benjamin Seaton, written and published by The Tool and Trades History Society in England, has some wonderful pictures and just enough measurements scattered throughout that with a pair of dividers and a rule, you can pretty much figure out the sizes of the chisels. I'm starting with the 1" chisel. I purchased a length of 1" wide, 3/16" thick O-1 tool steel from McMaster-Carr for the blades and some 1/8" O-1 for the bolsters. After figuring out the measurements from the book and sketching the design on paper, I laid blue painters tape on the 3/16" steel and laid out the chisel shape on that. I cut as close as I could to the line with a hack saw and fine tuned the shape with files. The blade is 3 3/4" to the shoulder and 6" to the bolster. According to the book, the 1" chisel is 1/16" thick at the start of the bevel and 3/16" at the shoulder. Pretty darn thin. To achieve this tapered blade, I turned to my bench-top belt sander with a 40 grit belt and ground the taper by eye, quenching in water often to keep the steel cool and checking the thickness with my dial calipers. I ended up with .0625 (1/16") at what will be the bevel end and .155 (just shy of 5/32) at the shoulder. I'm very pleased with the way this turned out. For the bolster, I drilled a hole in the 1/8" O-1 and then filed the hole square and with a little taper to slide into place down the tang and lock in place due to the flare of the blade. The bolster will eventually prevent the handle from pushing down to far form hand or mallet pressure. I filed the bolster to an octagonal shape and tapered the thickness out from the hole. Looks pretty good and will serve it's purpose.
So far so good. Next step is to heat treat. With the end being so thin, I don't dare try to establish the bevel prior to heat treating for fear of the steel warping. Stay tuned and keep your fingers crossed for me. I've never heat treated anything so thin.

Sunday, July 24, 2011

A New Saw. And Lots of First.

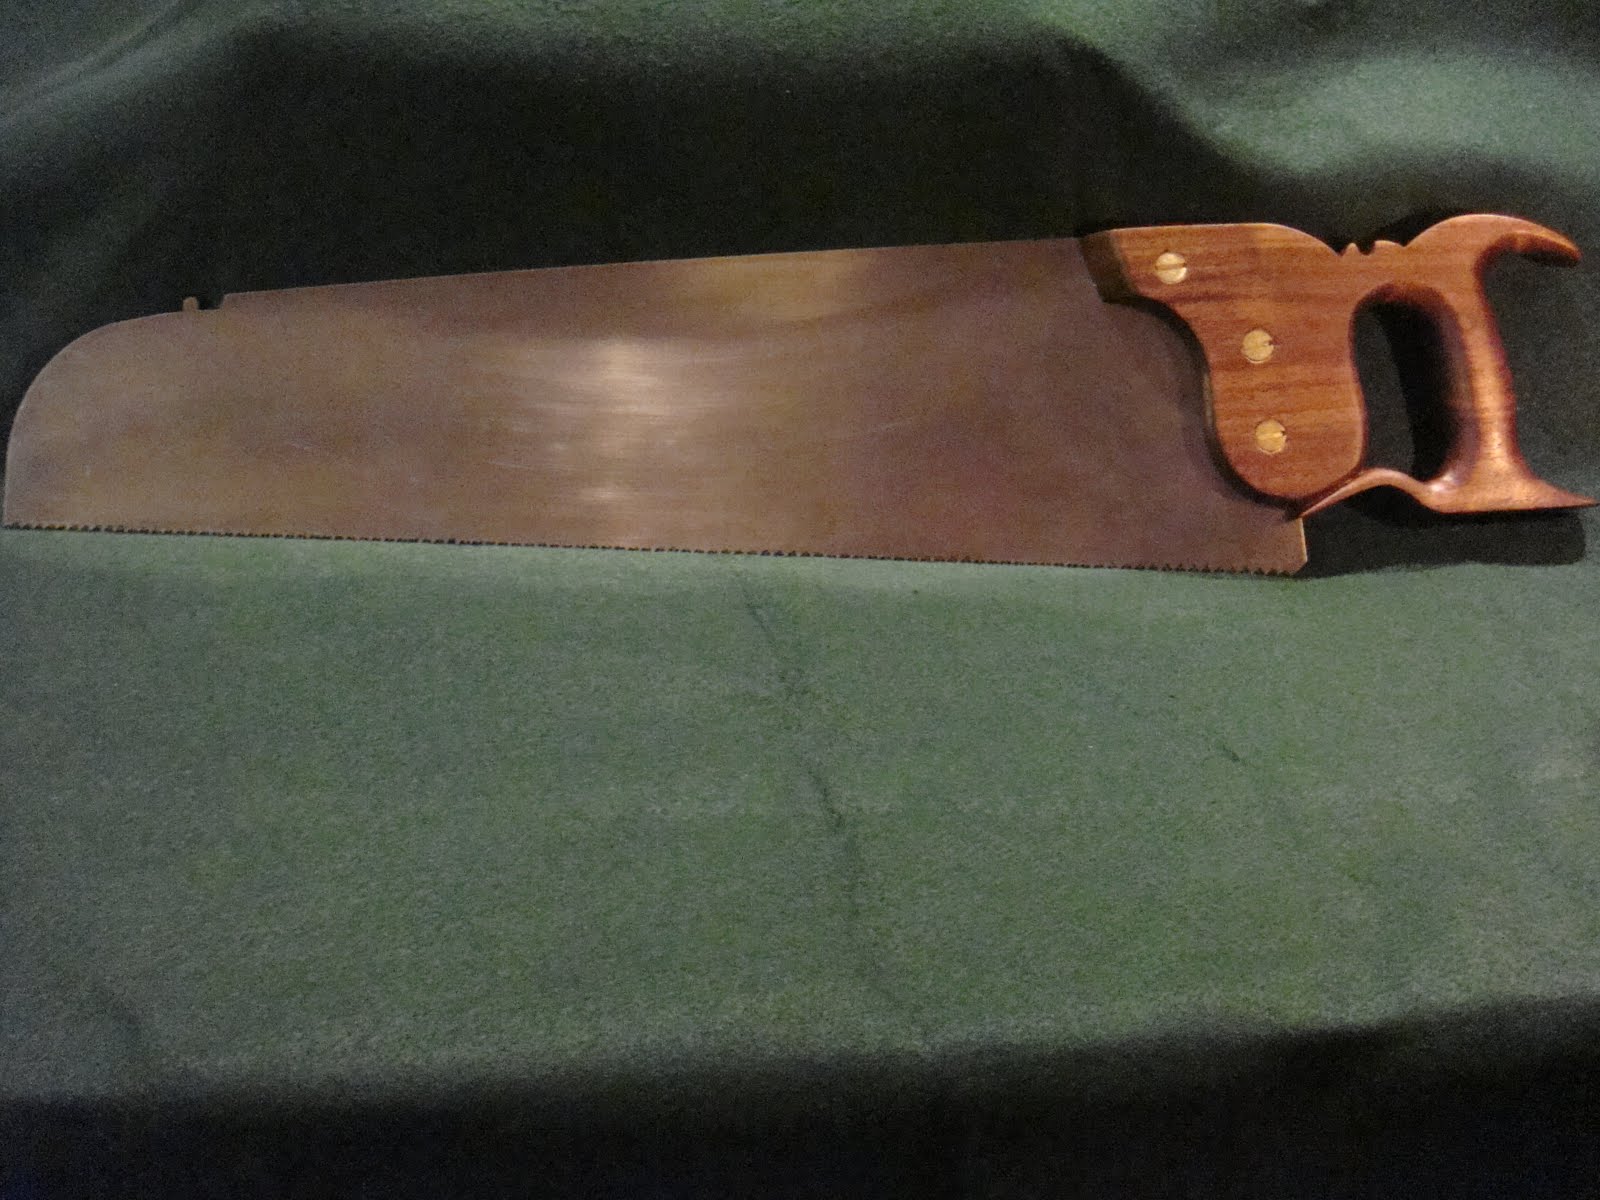
Well, I finally got this little panel saw done. I actually cut the saw plate out for this way back in September of last year. No sense rushing these things. This is the first panel saw that I've ever made and only the second saw overall. Consequently, it's also the first closed handled saw handle I've made and the first lambs tongue I've carved. All in all, I'm pretty happy with the way it turned out.

The saw plate started off as a piece of .032" 1095 spring steel from McMaster-Carr. I made a cardboard pattern of the shape and size I wanted the plate to be (pretty much like the Kenyon saw in the Seaton chest) and transferred this to the spring steel. Then I cut the plate to size on the metal shear at my work and then snipped around the toe til it was close and then filed to final shape. Don't ask me what I was thinking when I filed in the nib. Not the traditional placement I know. I'll just call it my signature look.
I brought the plate home and hand filed the teeth in the plate at 10 TPI using a pattern that I made on Exel, printing that out and using that as a guide for the tooth spacing.
That's pretty much where I left things until about a week ago when I got a wild hair and decided it was time to finish this thing. I drew up a pattern for the handle from looking at pictures of the saws in the Seaton chest on-line and in the book "The Tool Chest of Benjamin Seaton". The handle is black walnut that I had in the shop. I used my sash saw, and a coping saw to rough it out and the shaping was done with gouges, chisels, and rasp and sanded smooth with sand paper. The lambs tongue was just shaped with a v-gouge and a chisel. Wasn't nearly as tough as I thought it would be.

For hardware, I just used 1/4-20 straight slot counter sunk brass screws and brass square nuts. The square nuts were mortised into the right side of the handle and filed and sanded flush before the handle was finished. To finish the handle, I started off with two coats of Watco danish oil. This just left the wood looking dull and blah so I went and bought some Formby's low gloss tongue oil finish. Three coats of this, sanding with steel wool in between and a steel wool scuff up after the final coat to take some of the shine off and I called it done. While one of these coats was drying, I removed the bluing that was on the spring steel using citric acid. This was the first time I'd used this method and I was impressed with how quickly it worked. Less than 2 minutes and all the bluing was lifted right off.
I have lots to learn when it comes to saw sharpening, but I sharpened and set the teeth the best I know how and she cuts pretty good. Here's some test cuts. Nice thin kerf with no binding and a fairly smooth cut.

Hopefully as I learn more about sharpening she'll just cut smoother with every touch up.
I'm really finding myself enjoying the tool making aspect of this craft. There's nothing quite like using a tool that you actually made yourself. Now maybe I can use this new saw to cross cut some oak to size for the skirt on my still unfinished tool chest.
Oh, and I just got in some O-1 tool steel with which I'm going to try my hand at making some 18th century style square sided firmer chisels. Hopefully I'll get a chance to start on these soon.

Friday, July 8, 2011

Removing Rust with Vinegar-Mixed Results

A few weeks ago I went to a local estate sale and picked up 2 pair of Starrett dividers and a pair of Lufkin outside calipers. They were pretty rusty but the price was right, $15 for all three, and they were good brand name tools so I picked them up. You can never have enough dividers as far as I'm concerned. I'm starting to really see their usefulness in transferring measurements and laying out dovetails, among other uses. They're pretty cool tools and you can usually pick up vintage ones at a reasonable price. I could see myself developing a divider "problem" in the future.

Anyway, I was reading a post on WoodNet the other day where they were discussing de-rusting tools with citric acid. Vinegar was also mentioned as a good way to remove rust from tools. Hey, I have some rusty tools. AND Ihave some vinegar. Sounds like it's time for a little chemistry experiment. Well, I think I'd give myself a B- or a C in THIS Chem class. I'll let the pictures do the talking.

Before:

After:

As you can see, the 10" dividers didn't fare so well. Cleaned up nicely, but I guess I left them in a little too long. From what I understand, vinegar removes the rust, but also eats away the good metal if the tool is left to soak to long. Hopefully I can find a spring to replace the broken one on the 10" dividers.

Other than that little snafu though, I'd say I was impressed with the de-rusting ability of plain old white vinegar. Just a very little bit of wire brushing after a soak and things cleaned up almost like new. If you try this, just remember to immediately blow the tools off to remove the water that you rinse the tool with. I used an air compressor but you could use a hair dryer also. After I blew them off I sprayed them down with WD-40 for good measure. All and all, even with the little mishap, not bad for $15.

Wednesday, July 6, 2011

Just Piddling in the Shop


Well, it's back. Seems I've been stricken by another case of WWADD (Wood Workers Attention Deficit Disorder). With a tool chest sitting by my bench just begging to be finished and two panel saws and 4 back saws in various state of incompletion, it would only stand to reason that with the little bit of shop time I've had lately that I would work on building some wooden squares. I don't know why, other than the fact that I think they're pretty cool. Well, that and the fact that I've been watching Bob Rozaieski's pod-cast a lot lately and the episode on wooden squares caught my attention. If anyone reading this (IS anyone reading this?) hasn't been to Bob's site, do yourself a favor and check it out. He probably has the best, most informative blog going when it comes to hand tool woodworking. And his pod-cast are fantastic. He is doing the woodworking community a great service with his site.
Now, about these squares. The miter square is made from walnut with oak dowels pinning things together at a 45* angle. I cut the bridle joint with a small tenon saw and chiseled out the waste with a mortise chisel and then refined it by paring away at whichever side of the bottom of the bridle needed material removed to get my 45* angle. I established a true 45* angle on a test board by basically using this method. One more reason that dividers are one of the most valuable tools in the shop. When you strike these lines on your test board, I recommend that you use a knife rather than a pencil. A knife leaves a much more precise line.
The two try squared are made from beech with walnut dowels pegging things square. These squares started out as a piece of 1 3/4" x 1 3/4" beech, 18" long. I marked a line about 7/8" on the edge of the beech for the stock and ripped it with my D-8 rip saw, making sure when I marked it to orient things so that I'd wind up with quarter-sawn wood, much more stable. Then I took the remaining length of wood and ripped that in half for the blades. I planed the 7/8" stock down to about 3/4" and then made both edges square to the face and cut this into the lengths I needed for my two stocks; in this case 10" and 6". Next I cut the cheeks of a 1/4"wide bridle joint as I did with the miter square and then planed the blades to thickness to fit in the joint. Then it was a matter of squaring the blade to the stock using the same test board I'd used for the miter square and truing it to the 90* line that was established in the process of finding the 45* angle. If you're square to this line, flip the stock 180* so that the blade is on the other side of the line and if you're still square to the line, your square is actually square. At this point it's time to glue the blade into the bridle joint in the stock and let it set for a few hours. Then come back and drill holes for the dowels and glue those in. Once the glue set on these I pared away the excess with a sharp chisel and cut the decorative ends on the stock and the blade. This was traditional on craftsmen made 18th century squares. Made a few passes with a smooth plane to dress everything up nice and then I just finished with a few coats of danish oil.
I'm happy with the way these turned out and I think I'd like to make one more, maybe about a 4" or 5" version of the try square. The two I've made so far are a 15" and a 9" blade length. These are fun to make and really not that complicated and they'll serve you well for many years. And I always get so much more satisfaction using tools that I've made when I'm working on a project. Now I just need to find time to put them to use on some of these incomplete projects around the shop.

Sunday, June 19, 2011

What a Fathers Day haul!


Absolutely amazing generosity! I was floored when I unwrapped my Father's Day gift. Pleasantly so obviously. The details: A 4" Hamilton Marking Gauge in stunning African Blackwood, absolutely beautiful. The new Veritas Dual Marking Gauge, such a nice, heavy, quality tool. 3 Auriou Rasp; a 10" Cabinet Makers Rasp, grain 9; a 6" Modeller's Rasp, grain 15; and a 6" Round Rasp, grain 13. I had put the three rasp on my Christmas list ( never too early to start one of those :) ) so I was really surprised when all 3 showed up on Father's Day. Never tried a hand stitched rasp before but I can't wait to put them to use on some saw handles. Thank you so much to my wonderful wife (and to my girls, although I don't think they knew what they got me till I opened the box :) ).

Oh, and if all that wasn't enough, the day before Father's Day my step dad brought me a pristine Stanley 71 router plane with all 3 cutters, throat closing foot, depth gauge,
and fence. This thing looks like it MAY have been used once. A router plane had been on my short list for quite a while. Check. Looks like a type 13 best I can tell. Also included in his bag of goodies were a BUNCH of brace bits, including a 24, 22, 20, 18, and 17, and 5 expansion bits of various sizes, all in virtually new condition, and two old braces. Thanks David.

Needless to say, it was a great Father's Day. You guys sure know how to feed the tool addiction. :)