With this class in mind, I thought that it would be nice to have a portable (ish) tool chest to take some of my tools that would be relevant to the class along with me to North Carolina. So, in about a two week time frame, I'm going to attempt to build a tool chest. I actually started on it a few nights ago and so far, just have gotten the panels glued up for the front, back, sides, and bottom, and have cut to size and squared up the front, back and side panels. Going to start dovetailing the carcass today. All this is being done with no machinery, just meat power. I'm REALLY trying to get rid of those tailed beast. I'll update and post pictures when I get something worth showing. Looks like the size is going to be 26" long x 16" wide x 14" tall. Larger than I'd originally planned. Hopefully this won't be too big to carry. We'll see. More to come soon.
Friday, May 13, 2011
Preparing for a woodworking class/Building a tool chest?
I am signed up for a one day Dovetailing/Mortice and Tenon class at The Woodwright's School on May 28th. I've been very much looking forward to this since I signed up 4 or 5 months ago. I think just getting to spend the day with Roy is worth the price of admission all by itself, let alone actually having him show you his methods.


Tuesday, February 22, 2011
Woodworking ADD
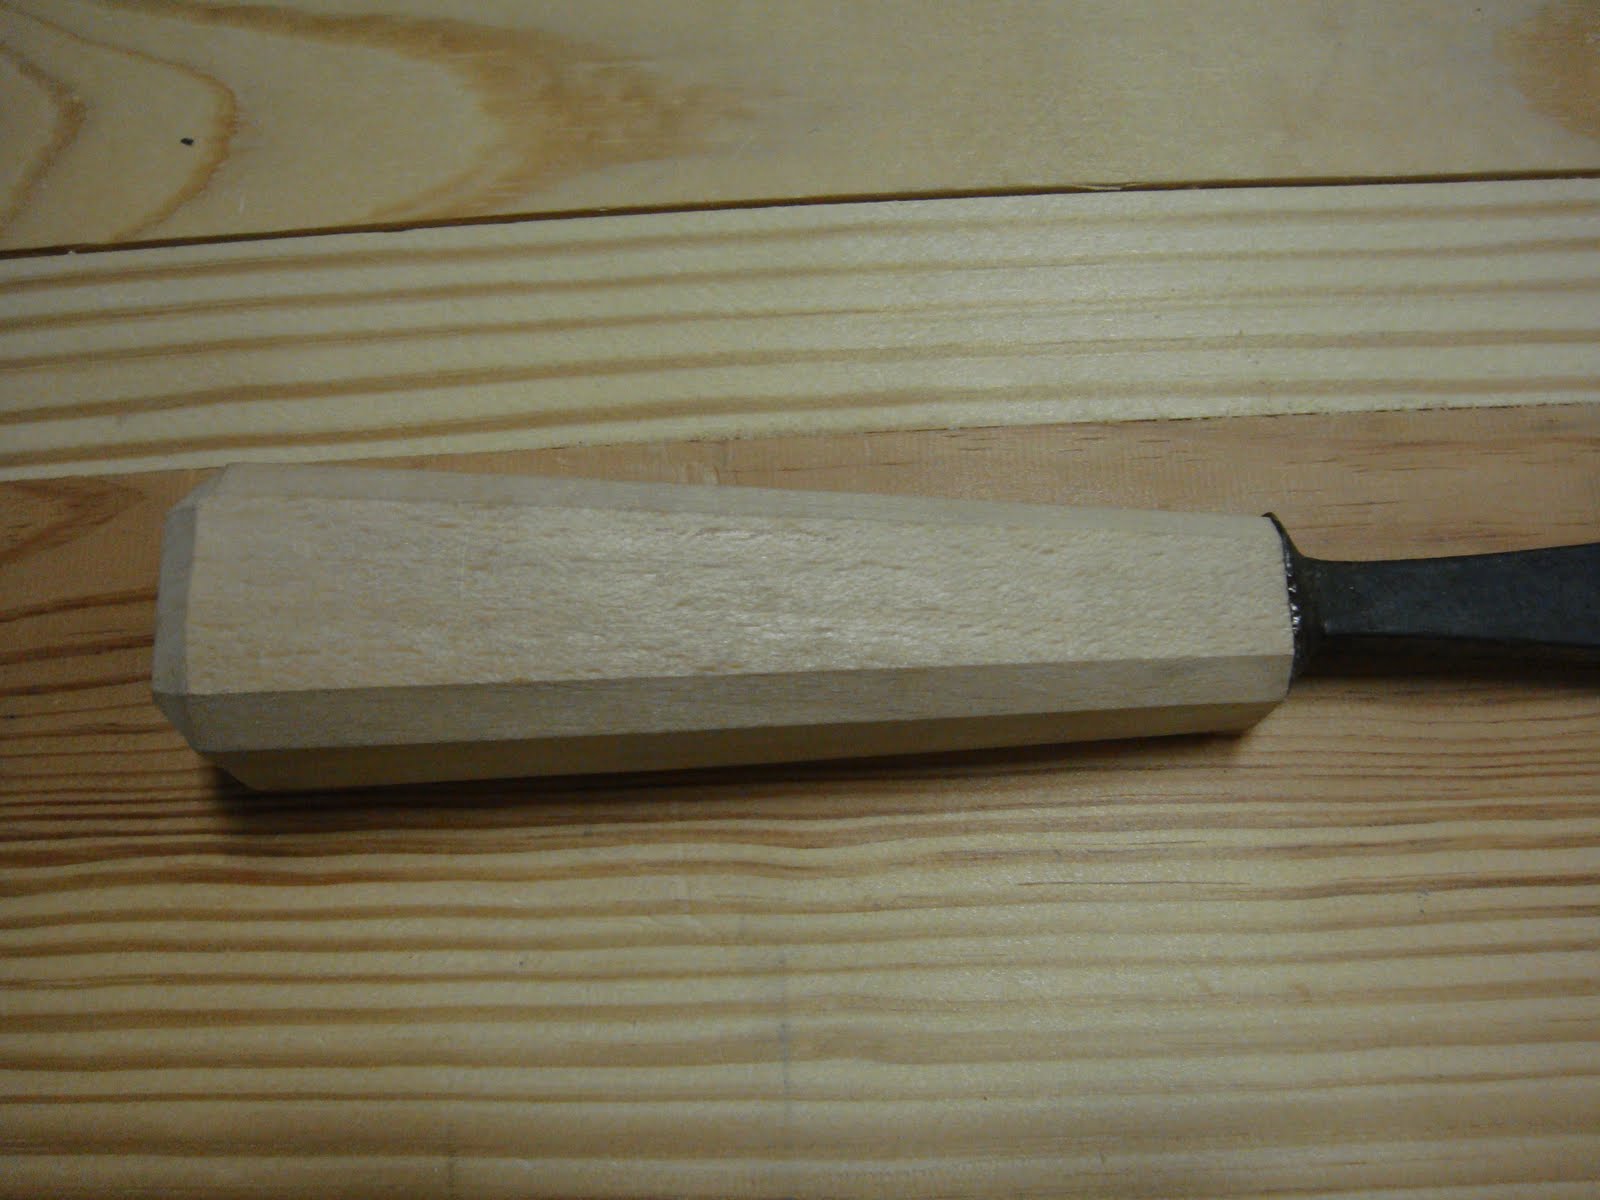


Well, I think it's official; I have woodworking ADD. That's Attention Deficit Disorder, not Accidental Death and Dismemberment. I seem to always have 3 or 4 projects going at once. I have a hand crank grinder I'm building, inspired by Bob Rozaieski's model, about 90% done; a 20" 10 TPI crosscut saw that I'm making from scratch that I filed the teeth into the plate and then set it aside; and a 22" 7 TPI saw plate for a small rip saw that's been sitting in the saw vise with teeth half filed in for about a month now. So with all these unfinished projects, it's only logical that I take and rehandle a chisel that I just handled 3 weeks ago. I just wasn't quite satisfied with the look and feel of the first one. I felt it to be too narrow at the top and possibly too long. This new one is beech also, an inch shorter, and of a much more pleasing look and feel, at least to my eye. This one was done rather quickly, at about 10:30 at night and is not quite perfect. The handle overhangs the tang on one side and is a little short of it on the other. And it may be just a bit too short but I'm gonna use it as it is for a while and see how I like it. Then I'll probably go for chisel handle version 3.0. Maybe I can get some of these other projects done in the mean time. Maybe. Although I HAVE been wanting to start on a saw till, and a sharpening station, and a spring pole lathe. Oh, and a router plane, and. . . . . . . . . . . . .
Monday, January 31, 2011
Handling a tanged chisel


I have a weakness for old square sided firmer chisels, so when I was at the PATINA (Potomac Antique Tools and Industries Association) meeting and auction last weekend and saw a nice 1 1/2" un-handled tang firmer for $6, I had to pick it up. Yesterday I had a little free time so I decided to make a handle for it. This was my first chisel handle and also my first time working with beech. I had a little laying around the shop that I was given a while back and thought that it would be ideal for a handle. I really like the way the beech worked with hand tools. Takes a nice, crisp edge. Made me wish I had some larger chunks for making a few wooden planes.
The process of making the handle was nothing groundbreaking, but here it is. I started off with a 2" square piece of beech and cut it a little over the length I wanted. Made sure one end was square and then marked the center. Drilled a hole in this end just a touch smaller that the tang where it meets the bolster to a depth of half the length of the tang. Then I switched to a bit a touch smaller than the tang width at it's half-way point and drilled this to the full depth of the tang. This allowed the chisel to go into the handle with about a half inch gap between the handle end and the bolster. The drilling was done with brace and bits. From here I marked the outer edges of the bolster on the handle end, removed the chisel and drew lines from there to the other end with the taper I wanted. Then it was just a matter of sawing close to the line and finishing up with a plane. After I had a square, tapered handle, I needed to knock the corners off to make the square an octagon. For this process I clamped my plane upside down in my twin screw of my bench and used it like a jointer, running the corners of the handle over the blade of the plane. This works really well for this and other small pieces you may need to plane. Just watch your fingers. After I had an octagon shaped handle, I trimmed it to length and then took a sharp paring chisel and pared bevels on the end of the handle for comfort. With the handle shaped, I inserted the tang in the hole, squared up the chisel blade to the handle, and whacked the butt of the handle on some scrap wood on my bench to seat the bolster flush to the handle. Done.
With me drilling the hole for the tang by hand, the handle is just slightly out of plumb with the chisel from side to side, but not enough to hurt anything. Overall, I'm very happy with how it turned out. I see more of these handles in my future as I just can't seem to pass up a good deal on a orphaned firmer.
Tuesday, January 25, 2011
Shave Horse


Well hello again blog reader. It's been a long time between post. Hadn't really done anything blog-worthy lately. My shop time has mainly consisted of a few started, but yet unfinished projects.
This past weekend I finally found some time to do a project that had been on my to do list for well over a year; a shave horse. And I have to say, this was one of the most fun pieces that I have ever built. I think what made it so much fun was going into it with the attitude that it was a functional piece of shop equipment that I didn't have to strive for museum quality on. As a matter of fact, on a piece like this, I think a little bit of crudeness, (or homemade ingenuity), adds character to it. At least that's my view of it. I love pretty tools as much as the next guy, but I just don't think I'd want a mahogany shave horse with bamboo turned legs and moulded ogee edges. No, for a piece like this I think southern yellow pine with drawknife and spokeshaved legs and the edges of the seat just clipped with a fore plane is just right.
This is only the third piece I've done with just hand tools. I'm really wanting to get to the point where I can ditch my table saw and I'm really getting close. All the material, minus some wooden dowel that I used to hold some round tenons together, is construction grade 2 x 12 southern yellow pine that I got from Home Depot on a recent trip to Colonial Williamsburg. SYP is not available where I live; have to go a few hours south. And it really is an ideal wood for shop equipment. Much more heavy and dense than the "white wood" or whatever they call the construction lumber here in Maryland.
Using plans found on Jennie Alexander's Green Woodworking website as my rough draft, I started off by cutting to length and ripping to width the boards for the bench and the ramp. This was done with a Craftsman 10 TPI cross-cut saw and my old Disston D-8 thumbhole rip saw, 5 TPI. Incidentally, I'm really becoming found of the overhand rip method, similar to what's shown here, only I saw toward me rather than away from me. This is much easier on your arm muscles, I can saw for much longer stretches without stopping from tiring out, and because you are sitting and not hunched over, it's much easier on your back. So, after cutting these boards to size, I cut 1 1/2" strips for the legs and then just trued things up with a fore and jointer plane. I then laid out and drilled 1" holes in the bench for my legs and then used a tapered reamer to make tapered holes. I then used a drawknife and spokeshave to shape the legs roundish and to taper the tops to roughly match the tapered holes in the bench. I definitely need more practice with that reamer. My holes were slanted just like I wanted them with the brace and bit, but got out of whack when I went at them with the reamer. No big tragedy because it's just a shave horse, but I gotta get that straightened out before I build any windsor chairs. :)
The ramp was attached to the bench with a wooden pivot much like Peter Follansbee used on his shown in his blog.
The round tenons that were used to hold the treadle together were fun to make. I just laid out a one inch square centered on the end of a 2" x 2" piece of pine, sawed the tenon cheeks down as far as I needed the tenon to be long, and then cut the shoulders to remove the waste. I then drew a 1" circle on the end of the square tenon and went about pairing away anything that wasn't that circle. These cross pieces were put into 1" holes on the treadle sides, the tenons drilled and held with some dowel I had laying around the shop.
I'm really happy with the way this turned out, especially for being just a little more than a days work. I haven't had the opportunity or the need to put it through it's paces yet, but I did try some scrap on it and it has tremendous holding power. This was a really fun project to build and if any of you have been thinking about it, I highly recommend that you make a shave horse for YOUR shop.
Tuesday, August 10, 2010
My "Someday" Shop


I've been dreaming of a hand tool only woodworking shop for a few years now. For now, I operate out of about a quarter of a 2 car garage. Not terrible; I'm sure some have less of a space than I do, but as I trend more toward working with hand tools, I find myself wanting a detached, dedicated hand tool shop. The good thing about working with hand tools is that you really don't need that big of a space. After all, you don't need to make room for the table saw, power jointer, thickness planer, drill press, band saw, radial arm saw, etc. I've been toying with some different design layouts and different size shops lately. These are the two most promising designs I've come up with so far. I don't have any fancy CAD programs, so these were just done on Exel, hence the crudeness, but you get the idea. The county I'm in doesn't require a building permit for buildings under 300 square feet, so both these come in just under. Any time you can avoid dealing with planning and zoning, I highly recommend you avoid it. I really want this to look more like an 18th century shop than a garage, hence the lack of an overhead garage door. I also want lots of windows to let in lots of natural light. I'm not even sure I'd run electricity to it if it weren't for the hot, humid summers we get here in southern Maryland. I think I'd at least need a fan out there. :) The photos are of the Shoemaker's Shop in Colonial Williamsburg. This is ideally what I'd like my shop to look like on the outside. Or at least somewhat this style. I believe that the area you work in can inspire you to do better work and a shop like this would just make woodworking that much more enjoyable for me.


Monday, August 2, 2010
Some dovetail and carving practice


I've been wanting to get out in the shop and do a small hand tool project, so last week I got a chance and made a little sliding top candle box with through dovetailed corners. Just made out of pine from the local Lowes. Cheap enough to make a mistake on yet decent enough to bring into the house when you're done. The box itself didn't come out too bad. 12º dovetails and a raised panel type top beveled with my 16" wooden fore plane and my new Clark and Williams smoother. The groove the top slides in was made by a 5/16" wooden groove plane I'd picked up off eBay a while back. Worked pretty well. Glued it up and threw some ebony stain on it for a quick, rustic finish. I thought this would be a good place to try out my new carving tools, so I made a couple of practice B's in some pine with my Pfeil 60º V-Parting Tool and pleased with the way they turned out, figured I was ready to carve into the top of the candle box. Well, let's just say that the practice B turned out a lot better than the one on the box top. Go figure. As for the Pfeil gouge itself though, I like it. Just have to learn how to wield it. Oh well, it matches the rustic look of the rest of the box and if it bothers me too much, I can always make a new top. That's the great thing about a little project like this; it's fun to do, but if you mess it up, no big loss. And it gives you a chance to hone some hand tool skills.
Saturday, July 24, 2010
My First Carving Tools


Took advantage of Woodcraft's 10% off sale and bought some Pfeil Swiss Made carving tools that I'd had my eye on for a while. I've never carved anything in my life, but have been fascinated by Peter Follansbee's work and also by the fine carving work I've seen by Kari Hultman on her Village Carpenter blog. I bought the set of 6 to start with, as it had tools that I thought would be useful in a variety of different projects. The set included a 8mm straight chisel(double bevel), 12mm #5, 10mm #7, 10mm #9, 3mm #11 veiner,and a 6mm #12 V-parting tool.
I went to the fabric store this afternoon and bought some duck cloth to make a tool roll to give my new tools some kind of protection. The roll has 19 slots, so I have room for more tools; Christmas coming and all, in case my lovely wife or wonderful mother are reading this. :) I'm no seamstress but I think the tool roll turned out pretty good considering I made it using my daughter's "I'm a Big Girl Now" sewing machine. :)
Hope to give a report on how they carve soon.
Subscribe to:
Posts (Atom)