Wednesday, January 16, 2013

Spring Pole Lathe Update - Pretty Good Progress


I haven't had a lot of time recently to work on the spring pole lathe, but I've made some decent headway on it. I didn't realize it'd been so long since I posted an update. A few weeks ago, I disassembled everything and chamfered the edges of the post and the movable poppet and also put a chamfer on the feet. I just used a drawknife to do the chamfers followed by a little sanding and the chamfer on the feet was just done with a couple wooden planes. With this done I was ready to permanently attach the post to the feet. I split off some white oak that I had sitting in the garage and ran it through a doweling plate I made a while back, ending up with 1/2" pegs. I put 2 oak pegs in each foot, offsetting the drilling process to achieve a drawbored joint. Although I'm sure it wasn't necessary, I added glue also. Those are rock solid joints. If anyone hasn't tried drawboring, I suggest you try it out. It adds an amazing amount of strength and really pulls things tight. And you don't even have to clamp up the joint.

Drawbored post to foot connection

Drawknifed chamfers


Somewhere in all this, my bolts came in from Blacksmith Bolt.com. Some massive 5/8 x 10 square headed bolts, square flat washers, and square nuts. No practical reason for the square headed hardware, I just think it was a good look for this project. I also had ordered some square headed lags to use as pikes for holding the workpiece, but ended up scrapping that idea for the finer threads of some square head machine bolts that I was able to pick up locally at the neighborhood Posner store. More on those in a minute. Anyway, with hardware in hand I was ready to permanently ( well, semi-permanent; no glue) assemble the bed rails to the post. Since I was going through about 8" of wood, I decided to drill halfway from each side and meet in the middle. THAT didn't work out very well. I got off somewhere along the line and had quite a bit of rasp work to do to make that bolt go through. But eventually I got it and all was well. I was still a little concerned about the post splaying in or out so I added a 3/4" oak board to the bottom of the feet to act as a stretcher. I let the board into the bottom side of the feet and chiseled out material deep enough that the board is an 1/8" or so above the floor; I didn't want to take a chance on it rocking on this piece. A couple screws on each side through the board and into the feet and then the whole works was back upright again. Boy did that tighten things up. There is zero side to side movement in this thing now.

Blacksmith Bolt hardware

And the other side

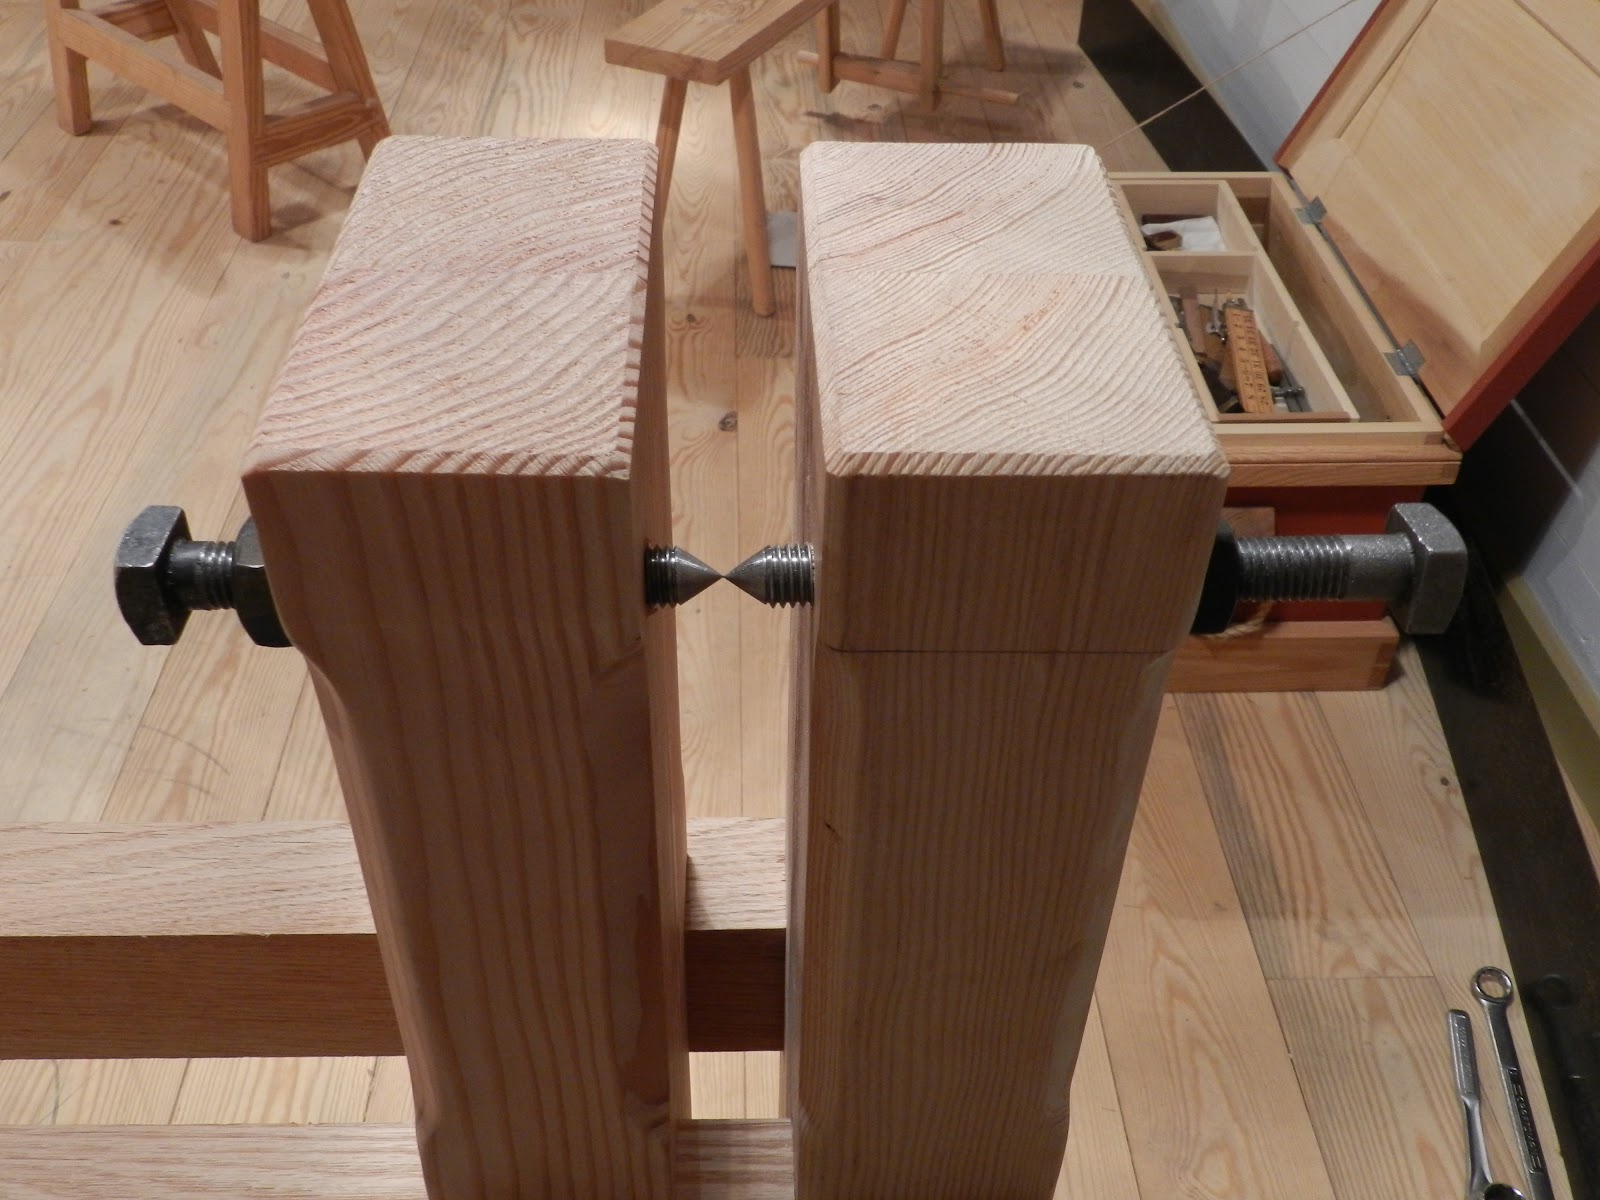
Ok, so back to those square head machine bolts from Posner. I ordered a two 5/8"-11 bolts; one 6" for the movable poppet and a 7 1/2" for the fixed upright. I chose the longer bolt for that side in case I wanted to add some sort of crank handle at a later date to make fine adjustments easier. Of course, both bolt were only threaded about the first 3", so I had lots of fun running a die down both of them, only leaving about 1/2" unthreaded. Now I had to get some 60* cones on the end of them. I bounced around a lot of ideas in my head and tried a few. What finally worked best was drilling a 5/8" hole in a 2 x 4 at the proper angle, attaching that to an auxiliary table I'd made for my bench top belt sander and running the bolt through that hole so that it met the belt sander at the angle I needed for that 60* tip. It worked surprisingly well. Now it was time for the scary part, drilling through the 3 1/2" thick stationary upright and movable poppet. After my previous adventure with drilling for the bed rail holes, I was pretty apprehensive. Gotta be done though. Measured and marked both side of each piece to be drilled, chucked up a 9/16" auger bit in my favorite brace and went to it. I decided to NOT drill from both side this time. I guess I was thinking pure thoughts during the process because when the tip of my auger bit emerged on the other side, it was right on my mark both times. What a relief it is having that done. Tapped the holes with a 5/8 tap and I'm in business.

I was SO relieved to see these line up like this

And from the top

And just one more :-)


I've also been working on the treadle assembly. Got a pretty good start on this. The joints are drawbored mortice and tenons. The wood is some oak I had from a never completed project about 20 years ago. Good to see it finally put to use. The design is pretty much a rip-off of Peter Follansbee's treadle from his lathe at Plimoth Plantation. I really love the look of that lathe and tried to capture some of it in mine.

Treadle assembly a bit better than halfway done

Drawbored mortice and tenon

And from the back. The material was different thickness,
but for shop equipment, I thought it was ok. Well, since it
was on the bottom. :-)

Peter's lathe at Plimoth showing the treadle I'm trying to
emulate 


I think that pretty much catches things up. Now that the pikes are installed I can make the mortices for the arms that will hold the tool rest. Have to finish up the treadle and then go find an appropriate little tree for the actual spring pole. I can't wait to start turning on this thing. I have visions of joynt stools and joynt formes dancing in my head.

Tuesday, January 8, 2013

Haversack #2


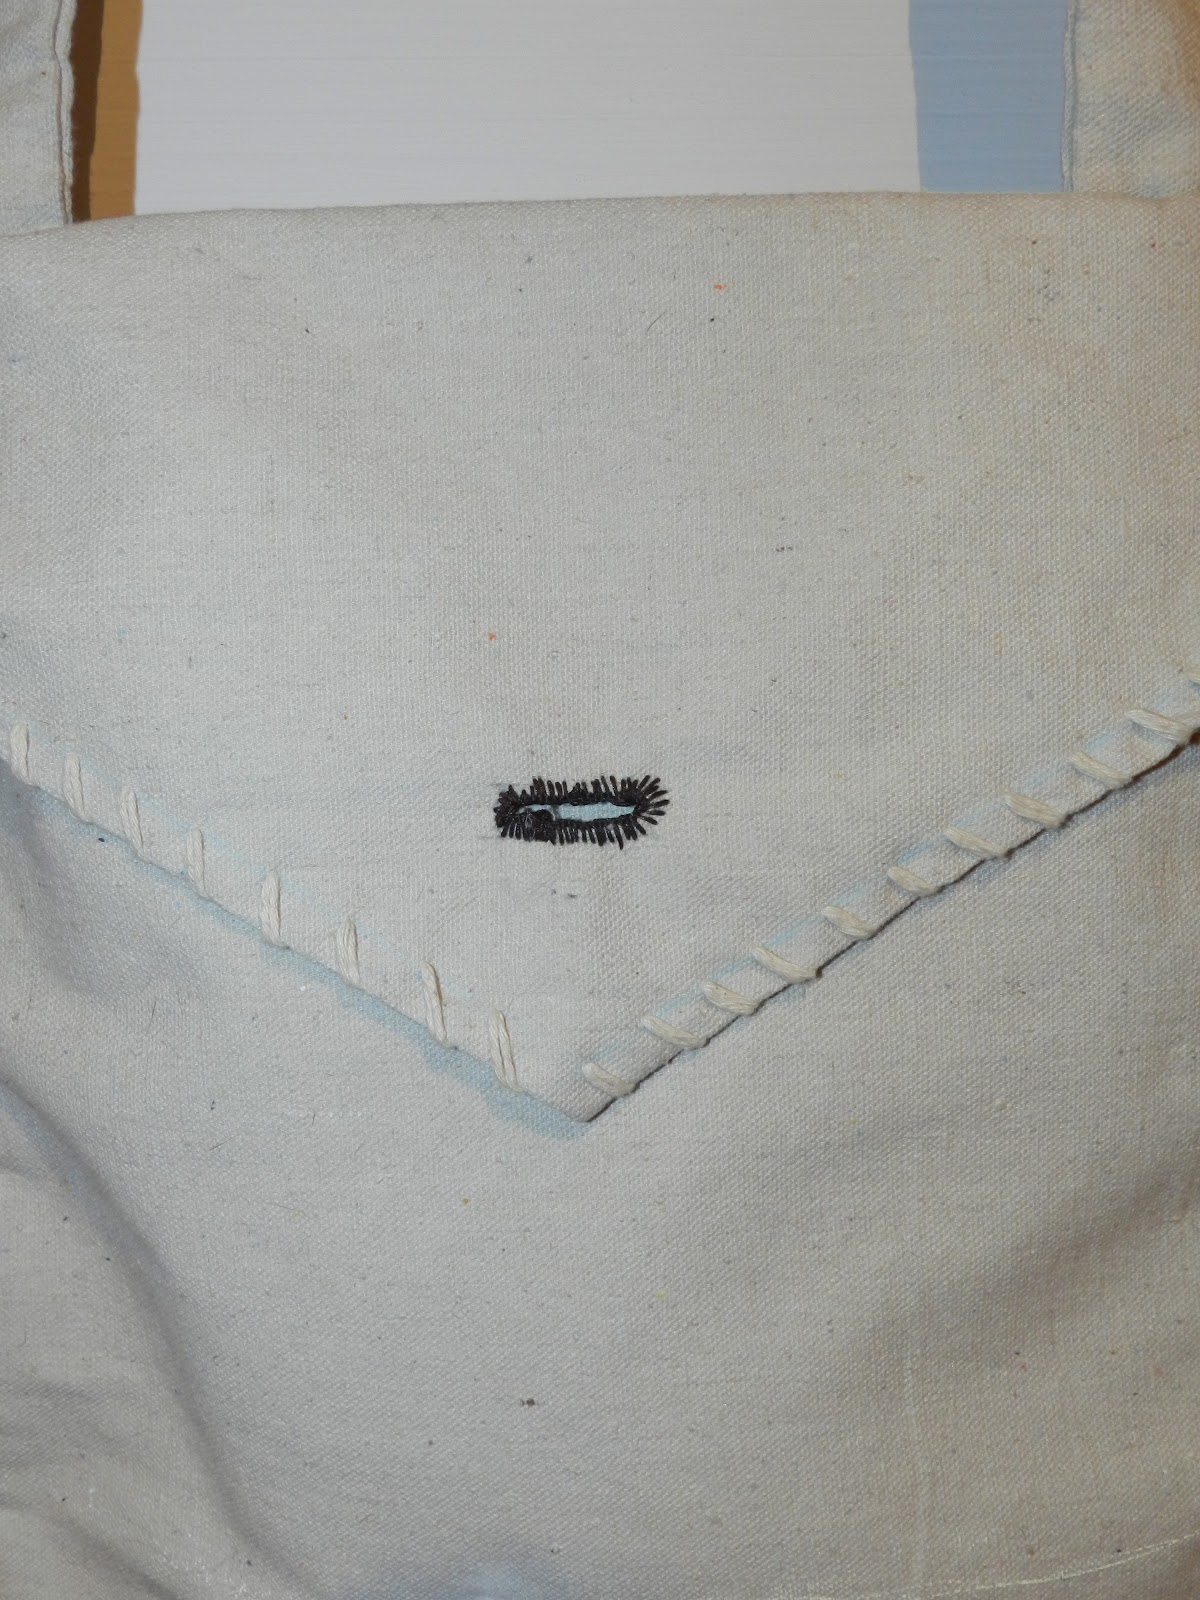
Got bored again the other night. And since I said I didn't have any use for the first haversack I made, it was perfectly logical to make another one. I can't say this one really went any quicker. Made the flap a different design with different stitching. I will say that my button-hole stitch improved a little, even if you can't really tell it from the picture. Now I have an excuse to go back to Colonial Williamsburg and get another pewter button to complete this. :-)


I know I said I'd never have a use for one, but I actually found myself wishing that I'd brought one with me to the Baltimore Woodworking Show this past weekend. Would have been a good way to carry the mortice chisel and spokeshave that I bought. Much better than that plastic bag that the chisel kept poking through. But I could just see myself repeatedly saying, "It's where I keep all my things. I get a lot of compliments on this. Plus, it's not a man-purse. It's called a satchel. Indiana Jones wears one."

Friday, January 4, 2013

Anual Christmas Gloat


I am very fortunate to have a wife, mother, and children who ask me what I want for Christmas and are happy to facilitate my woodworking addiction hobby. Every one went above and beyond again this year as the pictures show. From my wife, pole lathe turning tools by Ashley Iles, a sweet hand-made brass glue pot with electric warmer plate w/a pound of granulated glue, an assortment of Treemont nails, two Lost Art Press T-Shirts, and last but not least, a two day class at The Woodwright's School on Restoring Wooden Hand Planes. Really looking forward to getting back down to Pittsboro.

My Mom got me the Ray Iles scorp, season 6 of the Woodwright's Shop, the new Peter Follansbee DVD on making a joined chest, and a really nice book, Chairmaking Simplified.

My Dad gave me the lock-blade Kershaw knife, which I think I'm gonna keep in the shop. I have a smaller knife to keep in my pocket and it's nice to have a knife like this for general purpose task in the shop.

My girls surprised me with gifts of their own this year. My 11 year old, Gillian, got me a really nice welcome mat which resides on my brick pad at the front door of my shop. And Casey, my 14 year old, made the sweet sign for me to hang in my shop. She used a wood burner (first effort) and got the images for the tools off of my blog site. Pretty cool. :-)

So, thank you ALL. I appreciate all my gifts and will be sure to put them to good use. Man, my birthday's a LONG ways away yet. :-)


Monday, December 31, 2012

A Special Christmas Gift


I only made one piece this year as a Christmas gift. I believe that's one more than I made last year though, so I'm making progress. This year's gift was for my dad. I usually try to get him a nice bottle of bourbon or something; an unusual or small batch product. Well this year while looking around, I saw a bottle of Laird's 7 1/2 year aged apple brandy, non blended. Laird's Apple Jack was my dad's dad's drink of choice when he was at his hunting cabin, ( He bought 251 acres of land in the mountains near Berkley Springs West Virginia in 1957, which my dad still has ), and my dad likes it every now and then also, so I'd found what I was looking for.

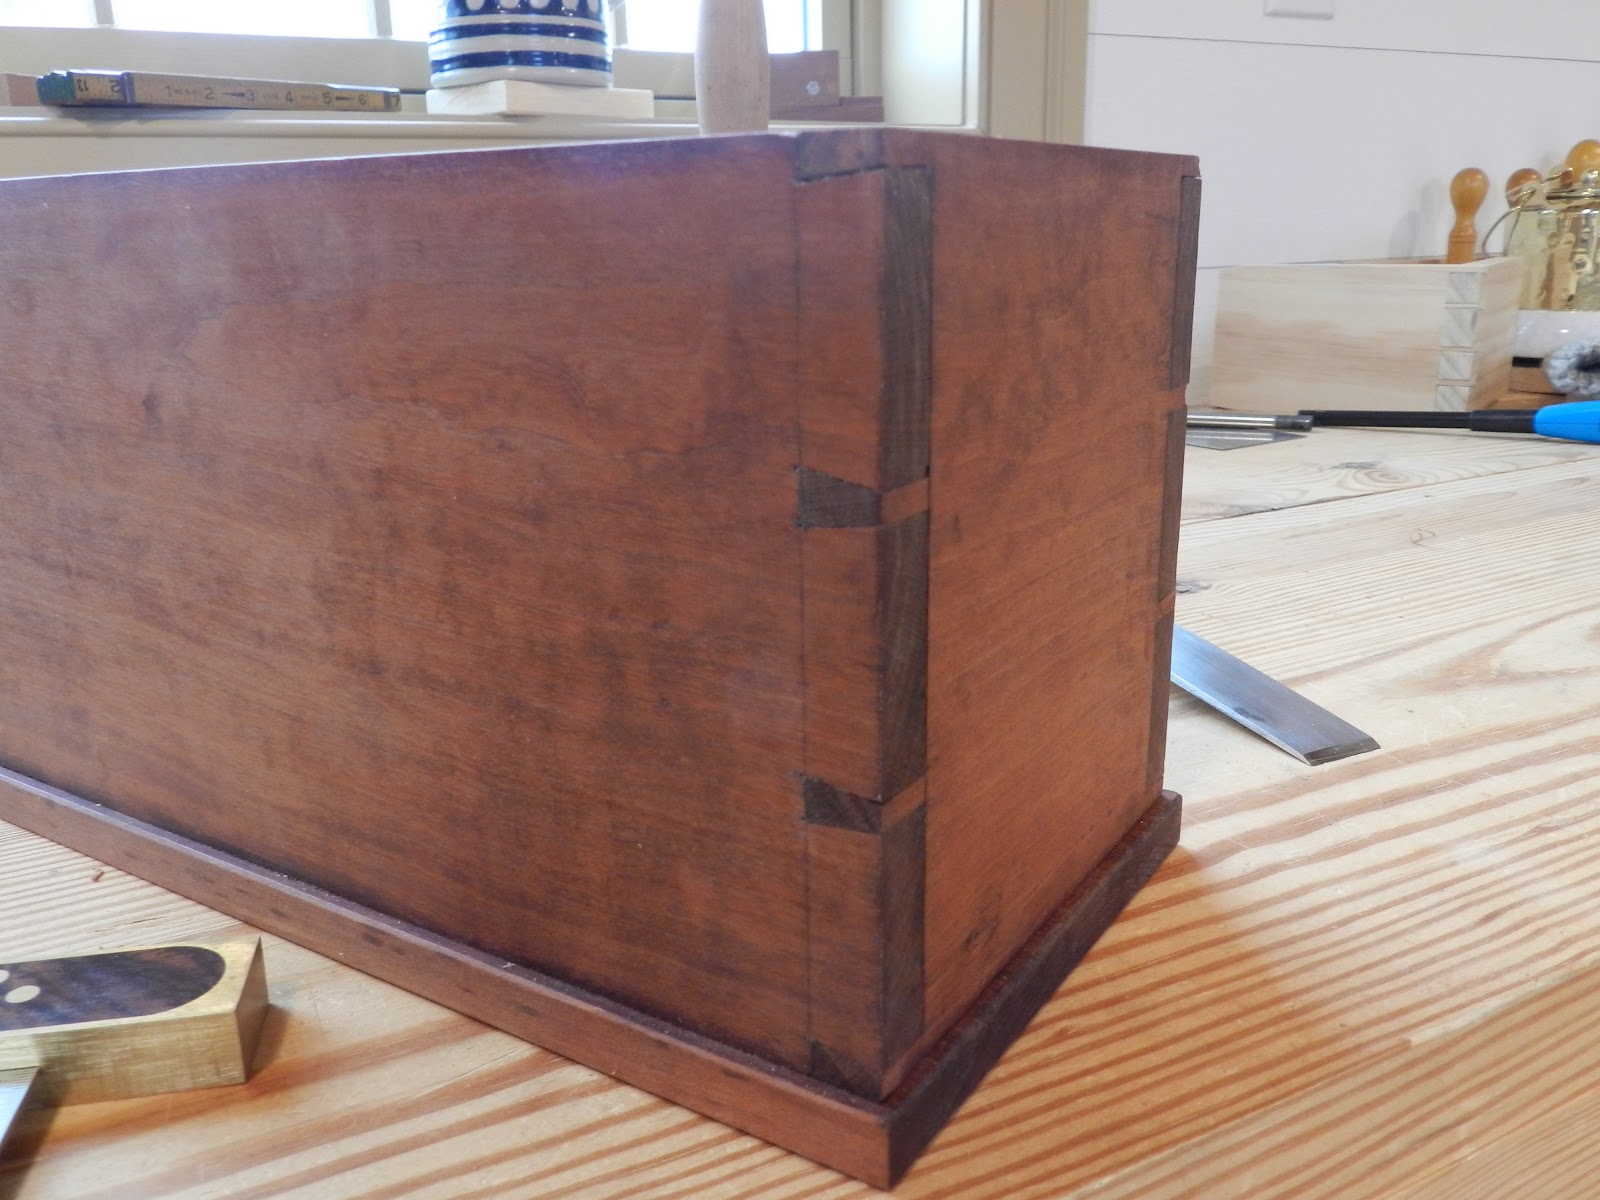
Now my dad's dad was a bit of a woodworker himself and I've got some cherry that was his that is probably 50 or 60 years old. I got it about 20 years ago and it had been planed down to 3/4" but obviously with some very dull planer knives. It was riddled with tear-out, so I planed it all down to 1/2" thick stuff. Well, after buying the bottle of apple brandy, I thought how cool would it be to make a box out of that cherry that came from my dad's dad to hold the bottle that my dad's dad liked to drink? Pretty cool I thought. So I decided on a sliding lid candle box type design sized to fit the afore mentioned bottle. Turned out to be a really enjoyable little project to build. I took a minimalistic approach as far as the tools I used. The corners are through dovetailed, the bottom or back just nailed on with reproduction headless brads from Kennedy Hardware ( nice stuff ), and I just used a marking gauge and a chisel and mallet to cut the grooves for the lid to slide in. I find it fun sometimes to askew specialty tools like a plow plane for a chisel and mallet. Anyway, after about 8 hours or so of work I was really pleased with the way it turned out. So much so that I'll be making myself one soon. For a finish, I applied a coat of True Oil, let it dry, and then buffed it out with fine steel wool. Because of it's age I suppose, this cherry has such a warm patina to it right away and it really begs for a simple finish. I made a bunch of cherry shavings from some of the scraps and used these to pack the bottle in the box. I find this packing much more attractive than styrofoam peanuts. :-)

Anyhow, Dad came down day before yesterday for his Christmas visit and he was very pleased indeed. Especially with the box being made from the cherry that was his dad's. Nothing can compare to the joy a woodworker gets from seeing how much a loved one appreciates a project you have made for them. Makes you want to get right back out in the shop and build more gifts.

Oh and by the way, we broke into the bottle and toasted Pappy with that apple brandy. That was some really smooth sipping stuff.


Most, but not all, of the tools used to make the box

No, the dovetails aren't perfect, but neither am I 

Really love the warm look of this cherry

A happy gift recipient and the humble cabinet maker

Saturday, December 29, 2012

What Do You Get When You Combine an Insomniac and an Old Drop Cloth?


In my case, an 18th century style haversack. Wednesday night I was having a hard time falling asleep. I went out to the garage to grab a soda out of the garage fridge and saw an old drop cloth on the shelf out there. My mind flashed to my most recent trip to Colonial Williamsburg and a haversack I'd seen at
Tarpley's store. I'd also seen some of the interpreters there wearing these. Did I need a haversack? No. Am I a historical interpreter or reenactor? Negative. Would I ever envision myself wearing said haversack? Again, I think the answer would be no. So OBVIOUSLY I had to make one. Off to Google Images. I use this resource a lot when I'm making or building something that I'm not really familiar with. Usually I find a image or two that's just what I'm looking for and I can typically build something from a picture.

So, after finding a picture that I liked, I brought the drop cloth into the living room where it was warm, dug up a sewing needle, and found my roll of cotton twine, which is what I decided to use to sew this up versus wimpy thread. I wanted to make the body of the haversack 12" wide by about 13" tall. I allowed about 3/4" on each side for a seam so I cut a piece of canvas 13 1/2" to 14" wide. I made the length about 50" because my plan was to have the bag divided by a pocket in the center, so 3 folds of 13 1/2" plus about 8" or so for the flap closure. I later decided to fore go the pocket so I have a double thick material front. After making my folds, I hand stitched the cotton twine down one side, across the bottom, and up the other side, turned the bag inside out, and had a basic bag. Next I folded over about a 1/2" seem around the flap, ironed a crease in it to hold it in place, and stitched the seam for the flap. The body of the haversack was now done. Time for a strap.

I cut a strip 4" wide by 64" long for the strap, which would put the top of the haversack at belt level for me. It wasn't difficult stitching up the strap, but hand stitching a 64" length of material was time consuming to say the least. Once done, I turned the strap inside out. This proved fairly difficult, but I figured out a little trick and once I did, things rolled right along. I doubled up the last 2" of the strap and  sewed one side on with a 1 3/4" square box of  stitching with a stitched X in the middle. Same thing on the other side and I'm calling it done except for a button to hold the flap closed.

This part's a little crazy because when I was in Colonial Williamsburg the prior weekend I bought my wife a pair of earrings from the James Craig Jewelry Shop. They also had a pewter button in the case with the "Don't Tread on Me" logo snake for only $5. I didn't have any use for a pewter button (or so I thought) but I have a t-shirt with this snake and motto on it, so I bought the button. Well, a few days later I suddenly had the perfect use for it.

Anyway, here's the finished bag. Looks pretty good hanging in the shop, which is I imagine where it will stay.


Thursday, December 27, 2012

Spring Pole Lathe Measurements


I had a blog reader request some measurements on the Spring Pole Lathe so I thought I'd post some pictures of the lathe with a ruler on it for some key measurements. I'd like to add that these are just the measurements I came up with that I think will work well. But time and use will tell if they are going to actually be good dimensions. The height of the dead centers is one of the key measurements and this will probably want to change based on your height. I'm about 5'8 in boots and I'm gonna set my dead centers at 40", just about elbow height, maybe a touch higher. Anyway, here's some pictures that I hope will help.


62" width from outside to outside of vertical uprights. Bed
rails are 62" long.

About 55 1/8" from inside to inside of verticals.

32" from floor to top of bed rails.

36" total height to top of left vertical post. This post gets
no dead center.

About 48" to top of right side vertical. This side will receive
one dead center @40", probably about 2" in from the front
edge.

Moveable poppit. Around 22" overall. Will receive a dead
center about 8" up from the shoulder, but this measurement
will be made by sliding it over to the dead center installed
on the right vertical upright and marking directly from that
Bed rails are approximately 2 3/8" wide by 3 1/2" tall.

Tuesday, December 18, 2012

Spring Pole Lathe - She's On Her Feet


Yesterday I finished getting the lathe bed rails dovetailed into the uprights and got the moveable poppet cut to shape and morticed for the wedge that holds it tight to the bed. Everything is turning out good so far. Bed rails are even and square to the uprights and the poppet holds tight to the rails. I guess the next step is to figure out what hardware I'll use for the dead centers and get those shaped and installed. I think I should probably do that before I mortice the poppet and the taller upright for the arms that will hold the tool rest as the height of the centers should dictate the height of the tool rest. I'm also just going to leave everything dry fit until the very end. Any shaping I may do to the feet or uprights I will also leave til the end. As for the location of the lathe, this looks like this may be my best bet. Guess it's either here or against the back wall.