I haven't had a lot of time recently to work on the spring pole lathe, but I've made some decent headway on it. I didn't realize it'd been so long since I posted an update. A few weeks ago, I disassembled everything and chamfered the edges of the post and the movable poppet and also put a chamfer on the feet. I just used a drawknife to do the chamfers followed by a little sanding and the chamfer on the feet was just done with a couple wooden planes. With this done I was ready to permanently attach the post to the feet. I split off some white oak that I had sitting in the garage and ran it through a doweling plate I made a while back, ending up with 1/2" pegs. I put 2 oak pegs in each foot, offsetting the drilling process to achieve a drawbored joint. Although I'm sure it wasn't necessary, I added glue also. Those are rock solid joints. If anyone hasn't tried drawboring, I suggest you try it out. It adds an amazing amount of strength and really pulls things tight. And you don't even have to clamp up the joint.
 |
| Drawbored post to foot connection |
 |
| Drawknifed chamfers |
Somewhere in all this, my bolts came in from Blacksmith Bolt.com. Some massive 5/8 x 10 square headed bolts, square flat washers, and square nuts. No practical reason for the square headed hardware, I just think it was a good look for this project. I also had ordered some square headed lags to use as pikes for holding the workpiece, but ended up scrapping that idea for the finer threads of some square head machine bolts that I was able to pick up locally at the neighborhood Posner store. More on those in a minute. Anyway, with hardware in hand I was ready to permanently ( well, semi-permanent; no glue) assemble the bed rails to the post. Since I was going through about 8" of wood, I decided to drill halfway from each side and meet in the middle. THAT didn't work out very well. I got off somewhere along the line and had quite a bit of rasp work to do to make that bolt go through. But eventually I got it and all was well. I was still a little concerned about the post splaying in or out so I added a 3/4" oak board to the bottom of the feet to act as a stretcher. I let the board into the bottom side of the feet and chiseled out material deep enough that the board is an 1/8" or so above the floor; I didn't want to take a chance on it rocking on this piece. A couple screws on each side through the board and into the feet and then the whole works was back upright again. Boy did that tighten things up. There is zero side to side movement in this thing now.
 |
| Blacksmith Bolt hardware |
 |
| And the other side |
Ok, so back to those square head machine bolts from Posner. I ordered a two 5/8"-11 bolts; one 6" for the movable poppet and a 7 1/2" for the fixed upright. I chose the longer bolt for that side in case I wanted to add some sort of crank handle at a later date to make fine adjustments easier. Of course, both bolt were only threaded about the first 3", so I had lots of fun running a die down both of them, only leaving about 1/2" unthreaded. Now I had to get some 60* cones on the end of them. I bounced around a lot of ideas in my head and tried a few. What finally worked best was drilling a 5/8" hole in a 2 x 4 at the proper angle, attaching that to an auxiliary table I'd made for my bench top belt sander and running the bolt through that hole so that it met the belt sander at the angle I needed for that 60* tip. It worked surprisingly well. Now it was time for the scary part, drilling through the 3 1/2" thick stationary upright and movable poppet. After my previous adventure with drilling for the bed rail holes, I was pretty apprehensive. Gotta be done though. Measured and marked both side of each piece to be drilled, chucked up a 9/16" auger bit in my favorite brace and went to it. I decided to NOT drill from both side this time. I guess I was thinking pure thoughts during the process because when the tip of my auger bit emerged on the other side, it was right on my mark both times. What a relief it is having that done. Tapped the holes with a 5/8 tap and I'm in business.
 |
| I was SO relieved to see these line up like this |
 |
| And from the top |
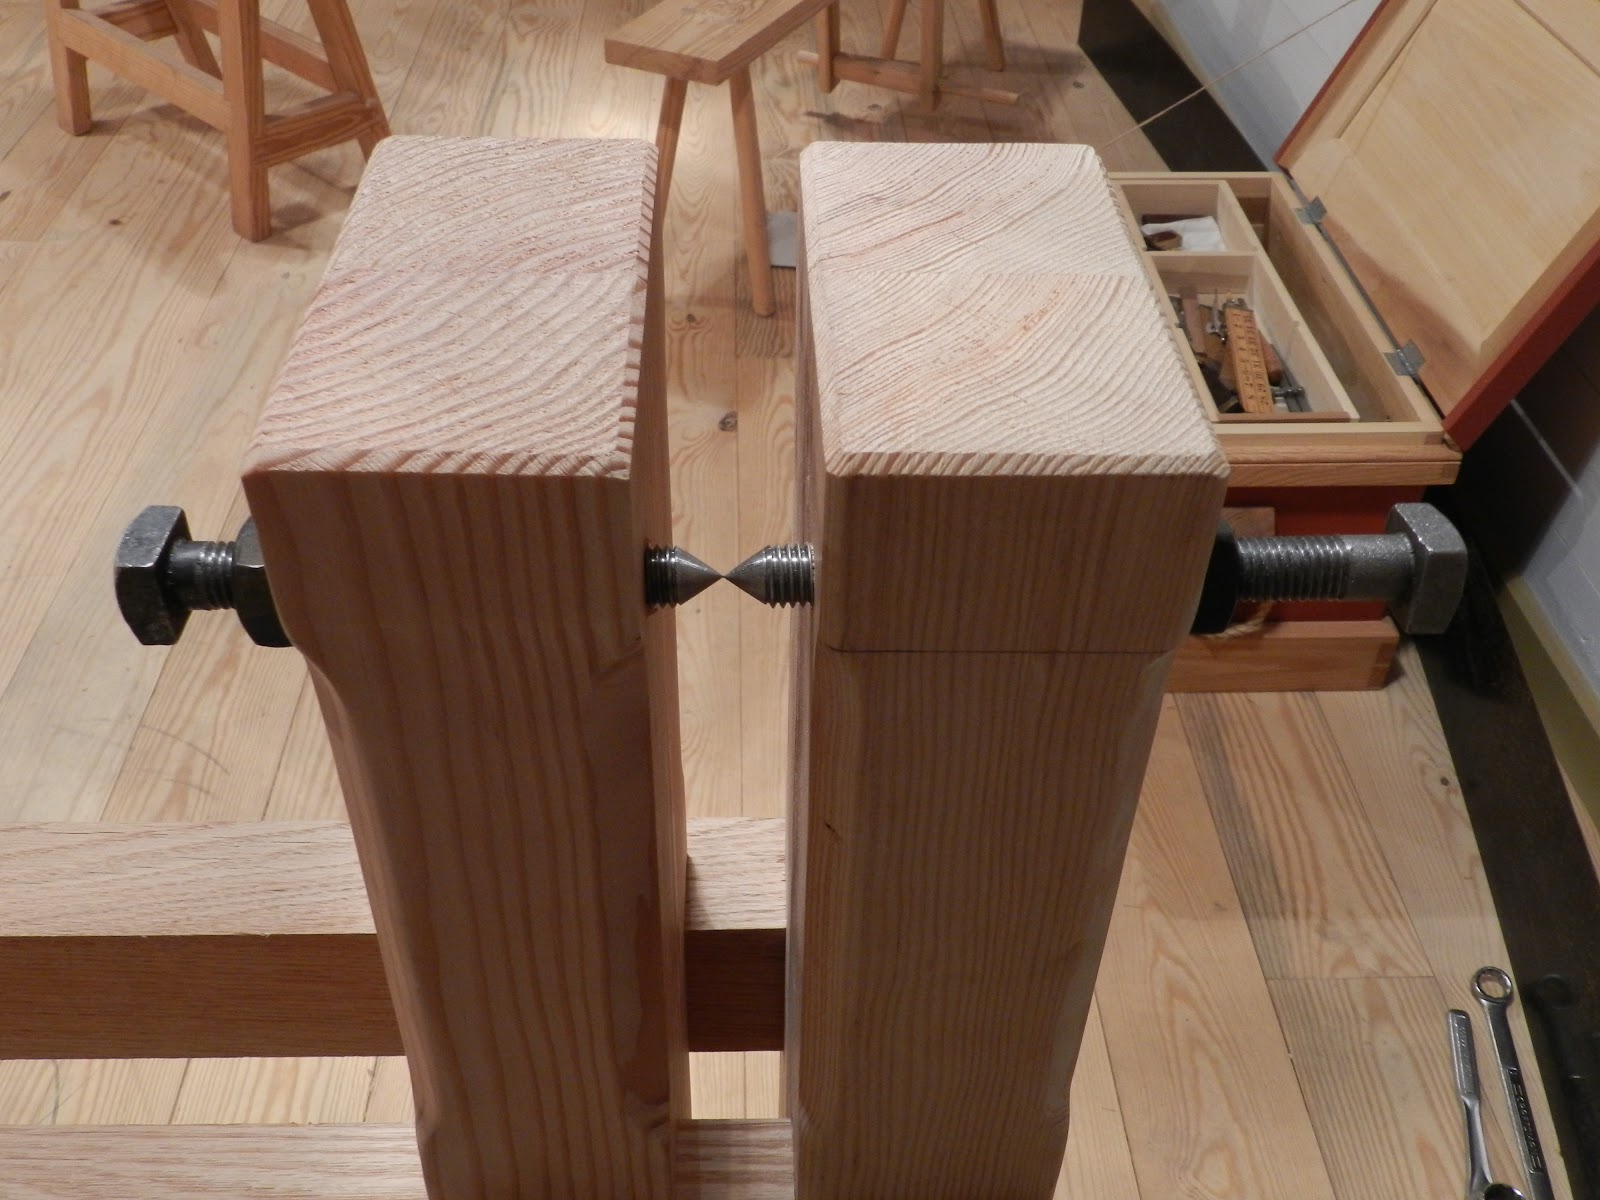 |
| And just one more :-) |
I've also been working on the treadle assembly. Got a pretty good start on this. The joints are drawbored mortice and tenons. The wood is some oak I had from a never completed project about 20 years ago. Good to see it finally put to use. The design is pretty much a rip-off of Peter Follansbee's treadle from his lathe at Plimoth Plantation. I really love the look of that lathe and tried to capture some of it in mine.
 |
| Treadle assembly a bit better than halfway done |
 |
| Drawbored mortice and tenon |
 |
| And from the back. The material was different thickness, but for shop equipment, I thought it was ok. Well, since it was on the bottom. :-) |
 |
| Peter's lathe at Plimoth showing the treadle I'm trying to emulate |
I think that pretty much catches things up. Now that the pikes are installed I can make the mortices for the arms that will hold the tool rest. Have to finish up the treadle and then go find an appropriate little tree for the actual spring pole. I can't wait to start turning on this thing. I have visions of joynt stools and joynt formes dancing in my head.
13 comments:
Wow, this look awesome! Man, I need to make my self one!! Thank you for taking the time to share it with us!!
Cheers
David
Moving along very nicely Jamie:)
Mom
Jamie you are a bad influence on me. You are making me want to rebuild my spring pole from the lighterweight Underhill/Hulot design to this more massive version. If I didn't already have lumber in the shop for the treadle design I might give in.
Thanks David. Glad you're enjoying it. You should definitely make one. It's a fun build.
Thanks Mom. I'm happy with the results so far.
Glad I could be of help Shannon. ;-) You know you can never have too many lathes. I say build your Hulot/Underhill lathe and then get to shaping spokes for a great wheel lathe. Think BIG.
one piece of advice, and to be honest i don't know where i heard it, but before you run the lath on a workpiece, polish the points. i took a scrap piece of pine and hammered the points in deep, then removed the pine and smeared some stropping compound into the holes and then remounted the pine piece with the cord wrapped ready to go. start stomping for a while, and the compound will polish the points helping subsequent work spin easier.
Thanks Dave. I think that's a great idea. And your method sounds like an easy way to do it and keep everything nice and conical. I will definitely use that tip. Thanks again.
Sorry I have not been able to comment as of late. Hope all is going well. The lathe looks pretty sweet even though I am still on the dark side (haha). I am looking forward to going home and retrieving my grandpa's lathe though.
Thanks Sonny. I got the tool rest done so the only thing I really have left is to get the actual pole mounted in the ceiling joist.
Great tip about Black Smith Bolt btw...
i like your website its very different. i'm quite sure i'll learn a lot of new stuff right here! looking forward for the next!
www.n8fan.net
you've gotten an incredible blog here! would you wish to make some invite posts on my weblog? online casino real money
Post a Comment