The chest was built in 1797 by a young Benjamin Seaton to house an extensive set of woodworking tools that his father purchased for him from Christopher Gabriel & Sons in London, England for his 21st birthday. What a birthday present! It was an impressive collection, featuring bench planes, moulding planes, 16 pairs of hollows and rounds, saws, chisels, gouges, and much, much more. After building the chest, Benjamin apparently, for whatever reason, never put the tools to work. He made a detailed inventory of the tools in the chest, and that inventory, along with a chest full of tools, is probably the most complete and pristine example of an 18th century cabinet makers inventory available to us.
What intrigued me most were the beautiful saws and the chisels. The chisels were unlike any available on the market today. Long, graceful looking chisels with square sides known as firmer chisels, not the bevel edged designs, tapering on their sides to almost nothing, that are so popular today. Since the day I saw the pictures of these chisels in the book, I've wanted some. To see how they work and just because I love the beauty of them. I can't find chisels like these, and if I could, I'm sure I couldn't afford them. So I decided to try to make a few.
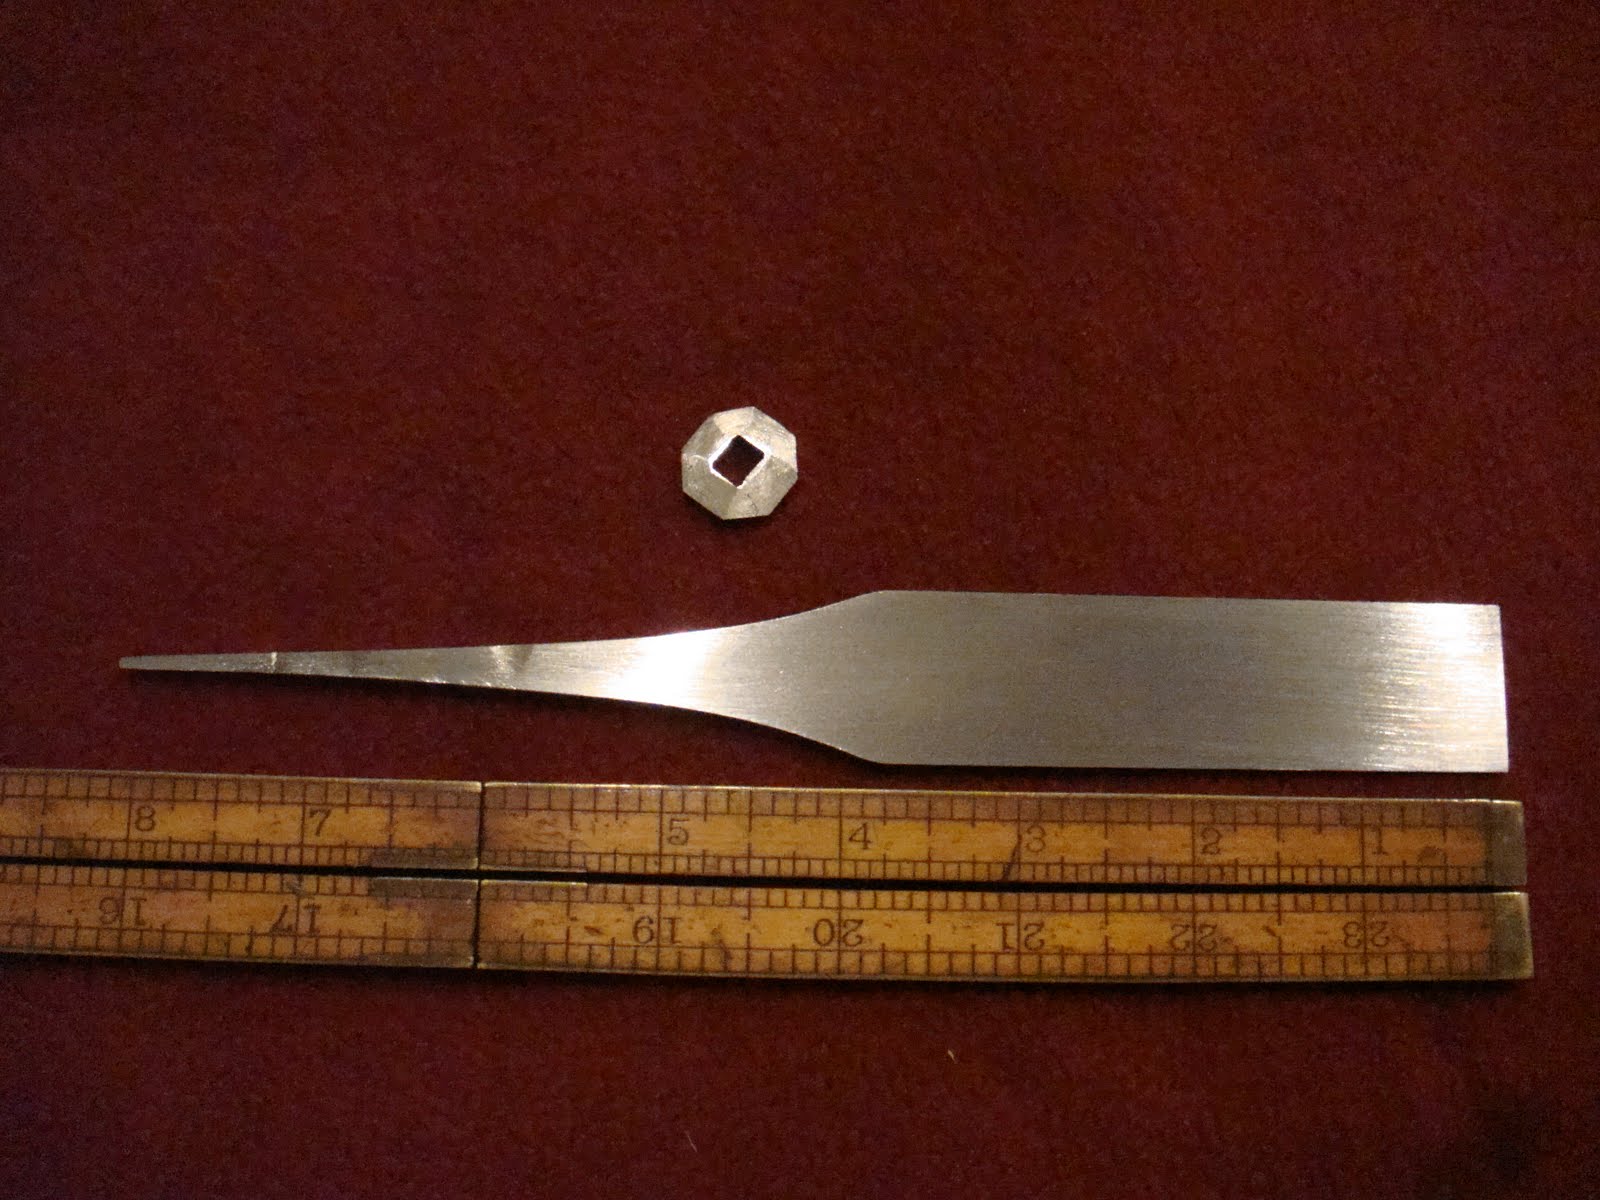
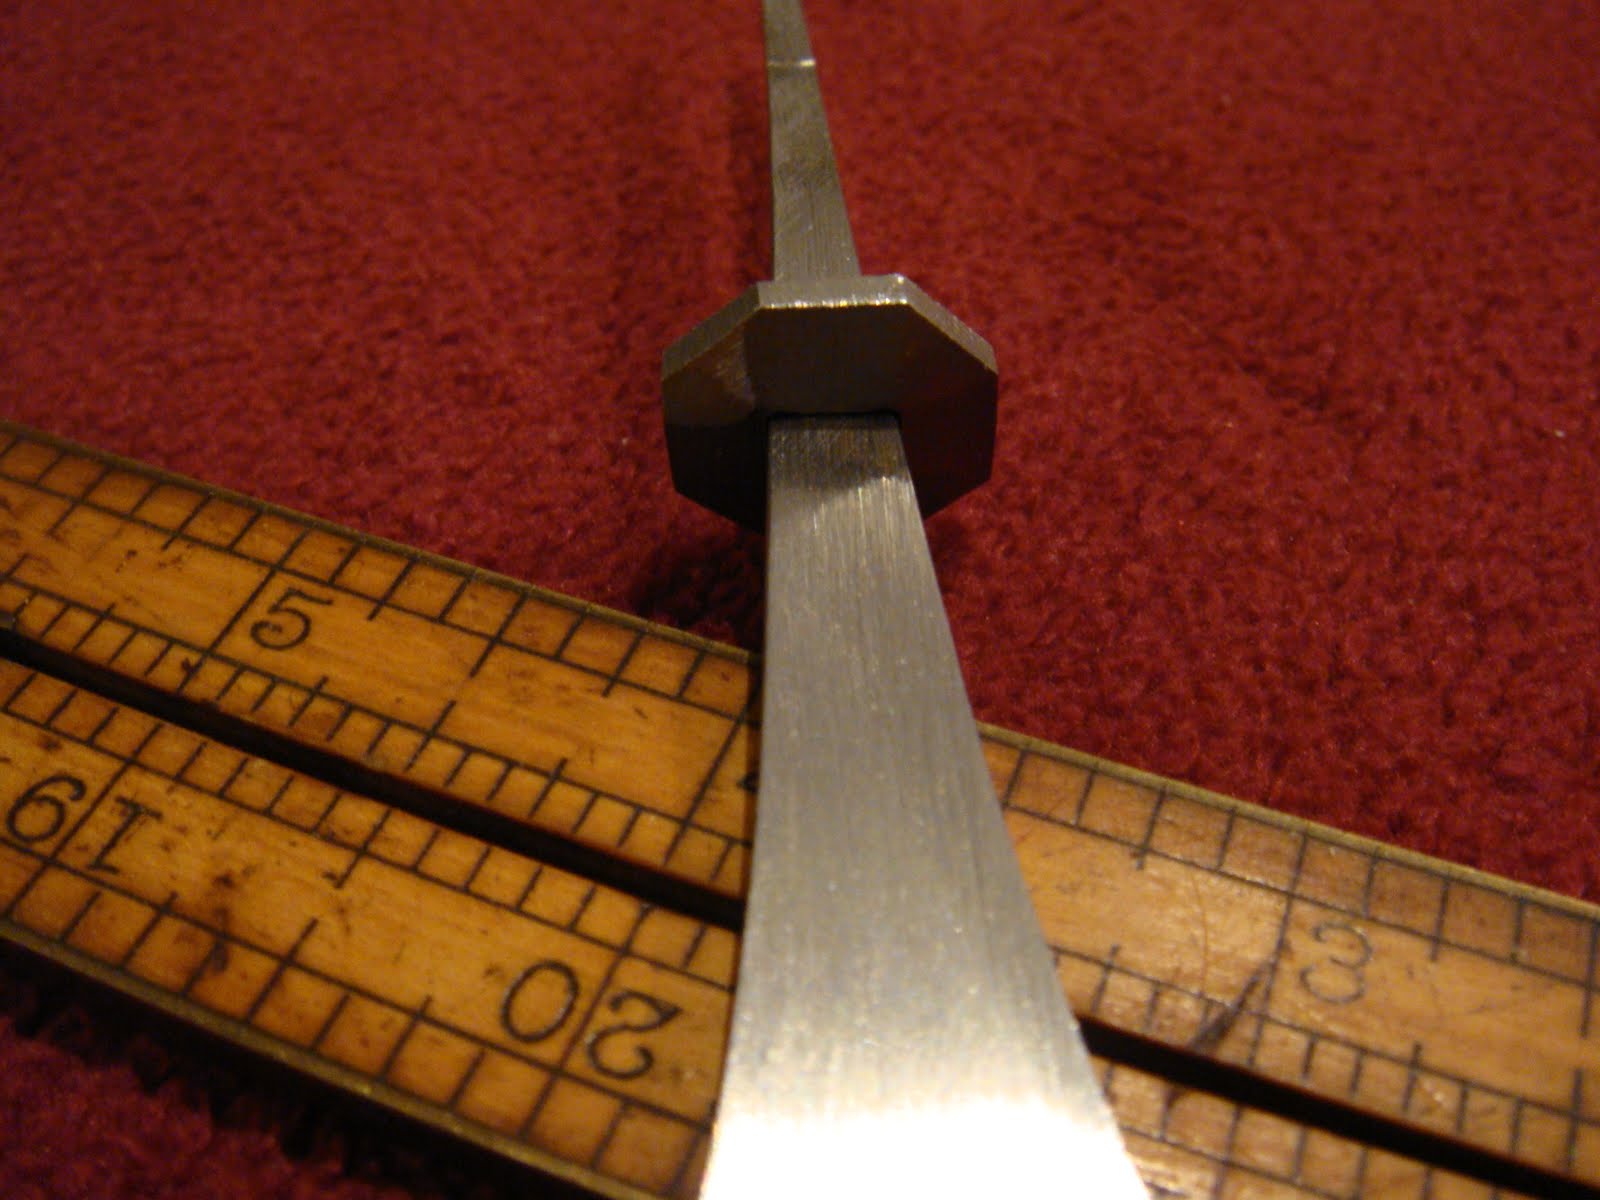
Time for a little detective work. The book, The Tool Chest of Benjamin Seaton, written and published by The Tool and Trades History Society in England, has some wonderful pictures and just enough measurements scattered throughout that with a pair of dividers and a rule, you can pretty much figure out the sizes of the chisels. I'm starting with the 1" chisel. I purchased a length of 1" wide, 3/16" thick O-1 tool steel from McMaster-Carr for the blades and some 1/8" O-1 for the bolsters. After figuring out the measurements from the book and sketching the design on paper, I laid blue painters tape on the 3/16" steel and laid out the chisel shape on that. I cut as close as I could to the line with a hack saw and fine tuned the shape with files. The blade is 3 3/4" to the shoulder and 6" to the bolster. According to the book, the 1" chisel is 1/16" thick at the start of the bevel and 3/16" at the shoulder. Pretty darn thin. To achieve this tapered blade, I turned to my bench-top belt sander with a 40 grit belt and ground the taper by eye, quenching in water often to keep the steel cool and checking the thickness with my dial calipers. I ended up with .0625 (1/16") at what will be the bevel end and .155 (just shy of 5/32) at the shoulder. I'm very pleased with the way this turned out. For the bolster, I drilled a hole in the 1/8" O-1 and then filed the hole square and with a little taper to slide into place down the tang and lock in place due to the flare of the blade. The bolster will eventually prevent the handle from pushing down to far form hand or mallet pressure. I filed the bolster to an octagonal shape and tapered the thickness out from the hole. Looks pretty good and will serve it's purpose.
So far so good. Next step is to heat treat. With the end being so thin, I don't dare try to establish the bevel prior to heat treating for fear of the steel warping. Stay tuned and keep your fingers crossed for me. I've never heat treated anything so thin.


5 comments:
WOW! Very ambitious project! I thought about doing the same, but I decided it was too much work for me and settled on buying old 19th century firmers instead. They don't taper as much as the earlier chisels, but they were a lot less work :). I'm excited to see how these turn out for you. Nice work!
Nice work, Jamie - but a LOT of work! It will be interesting to learn how flat they stay during and after heat treatment.
Thanks Bob. It's definitely a lot of work, but I enjoy doing it so I guess it's more fun than work. :)
Al, I'll be interested in seeing how flat it stays during heat treating also. That's why I'm not going to make any more sizes until I see how this one does during heat treating. If worse comes to worse, it'll look good sitting in my tool chest. :)
That is another reason to not grind the bevel until the heat treating is done. If you heat treat before grinding the bevel, you can then see which side of the tool has warped concave and grind the bevel on the opposite side so the face of the chisel is concave and the bevel side is convex. This is the best scenario and was how the chisels were made historically. The concavity of the face aids sharpening by concentrating the work on the stones only at the very edge where it is needed. The concept is just like a Japanese chisel with a hollow scraped back. So whatever you do, after the heat treat, find the concave side and do not lap it out. Just grind the bevel on the convex side and you'll have a chisel that is perfectly set up.
My Grandpa used to say "You'll go straight to Hell if you work steel cold!".
Post a Comment