Thursday, February 23, 2012

My "Someday Shop" Update

Back in August of 2010, I wrote a blog post entitled " My Someday Shop". Well, the Financial Department (AKA, my lovely wife Jen) told me that if we made out ok on our tax returns this year, I should build my shop. Obviously I was on pins and needles as we sat getting our taxes done, watching the refund total switch back and forth from shop to no shop with every entry our tax lady typed in. Finally, the end result. Good enough to get the final go ahead. WOO HOO!!!
So, since then I've been drawing, designing, getting prices on material and asking everyone I know if they have any old windows lying around. Pretty sure I'm gonna go with a 15' x 20' shop and try to make it look as much as possible like the shoemaker's shop from my earlier post. I checked with one of the local Amish saw mills on lumber prices. Really no cheaper on the framing lumber than the home centers, but I was pleased with their price for 1 x pine T&G flooring. At $.65 a board foot, it's actually a little cheaper than 3/4 T&G ply and is WAY cooler than plywood. About a two week lead time, so I think I'm going to order that this Saturday.
I also stopped by our local Habitat for Humanity Restore spot and found a deal on two window sashes that I think I can use. They are actually top sashes out of a double hung window, but at $35 for the two of them, I can make them work. They're really nice Pella sashes, vinyl mullions on the outside and unfinished pine inside. Turned sideways, one of them will make a perfect large window over my work bench on the front wall, where the casement window is on the front of the shoemaker shop. I'll get plenty of natural light from this 52" wide x 37" tall beast. I'll probably put the other one on the back wall, maybe put a lathe under that one. Still time to think about all that. Gonna shoot for a start time of late March or so. Not sure I'll have enough money to totally complete the inside, but I'll at least get her weather tight and then I can finish the inside as money permits. I'll be posting my progress as I go. Needless to say, I'm pretty psyched!

Saturday, February 18, 2012

There's a Desk in Here Somewhere


....I just have to find it.

My wife's job is very demanding. Most days she works nine hours or more at the office and then comes home, eats dinner, and works another hour or two from home until it's time for her to go to bed. This being said, she loves her job. What she doesn't love is having two monitors, a docking station, her work lap-top, keyboard and mouse sitting on a folding table in the living room serving as her home desk. She hates clutter and she likes to have the house looking nice at all times. Her present work station doesn't fit in with that. That's where I come in.

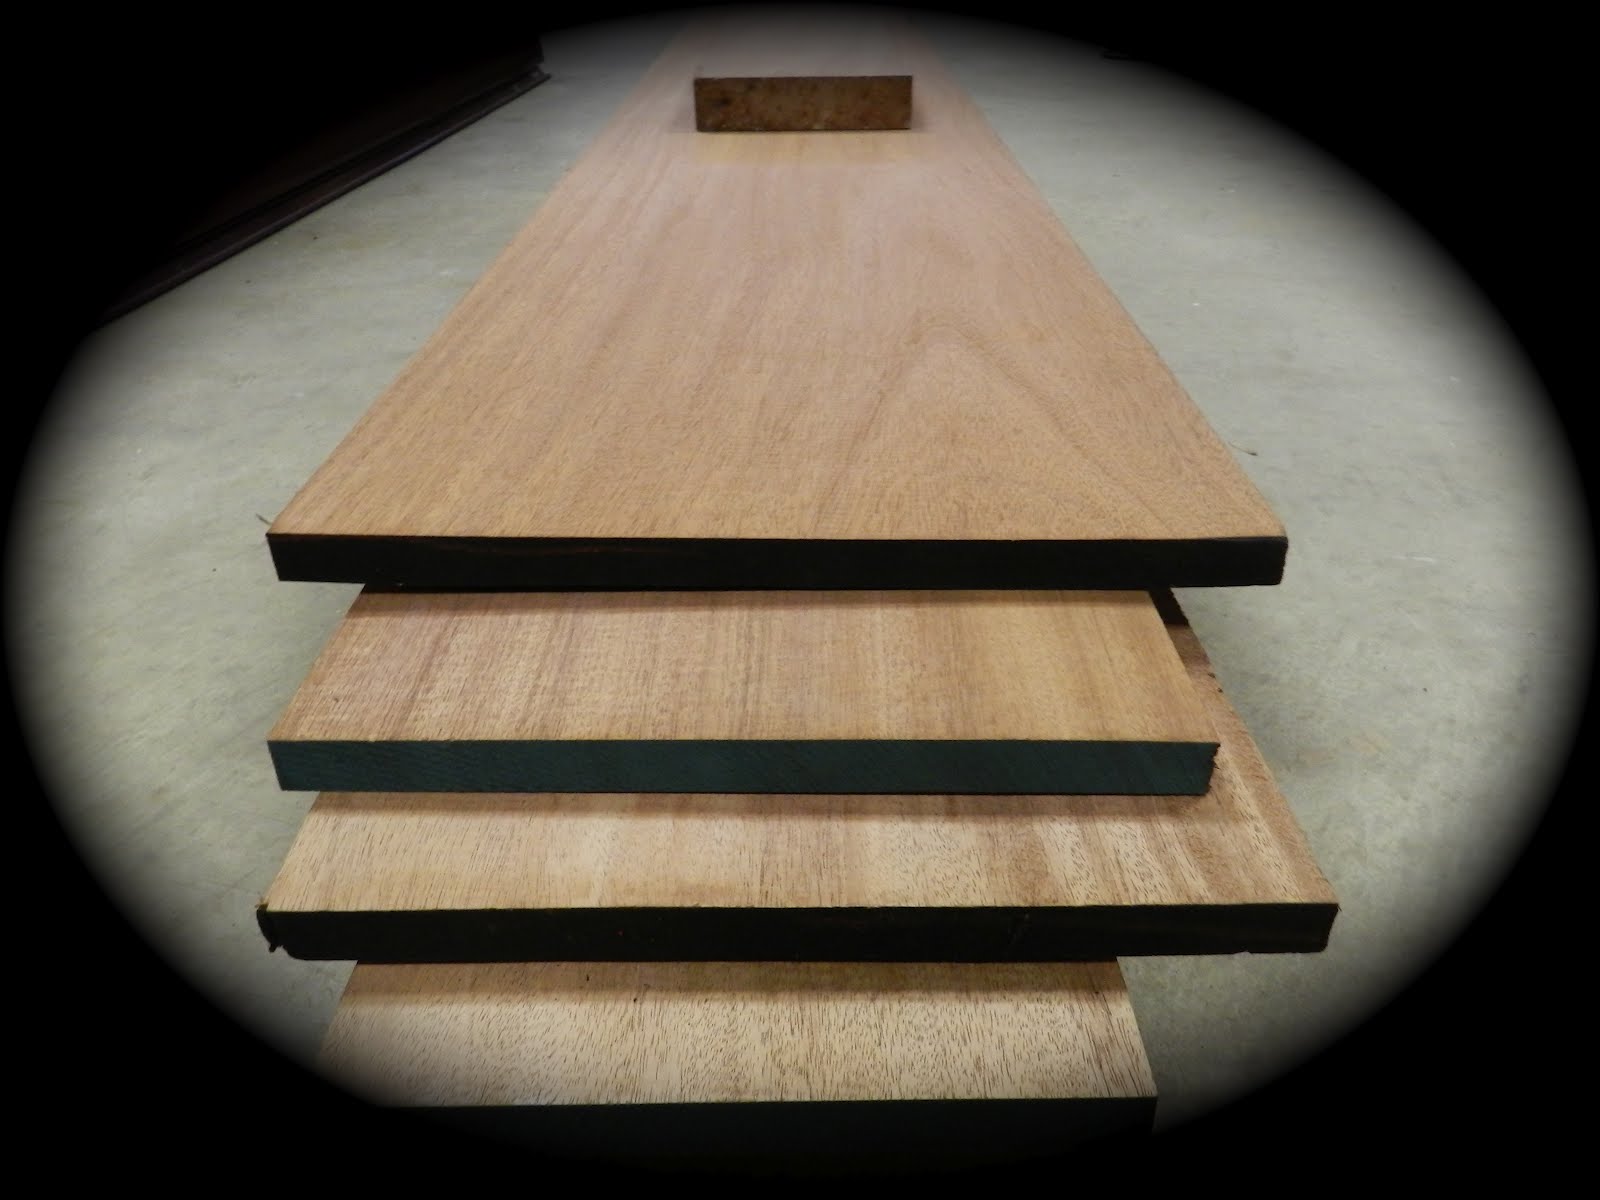
She has asked me to build her a desk. Somewhere she can work comfortably, but when she's done, be able to hide things behind closed doors for that neat, clean look she desires. So, after looking though a bunch of my furniture books and scouring the internet I came up with something we both like. It's a plantation desk, sized and modified to suit her specific needs. We decided on Walnut for the desk. I'm thinking 55 to 60 board feet of primary wood and just a few poplar boards as a secondary wood where I can get away with it. I had contacted a local hardware store/slash lumber company about the walnut and was told they just got in a fresh batch from Pennsylvania. When I got there and looked at the stack, I was pretty disappointed. Of all the 4/4 walnut, there was none that was over 6 inches wide. And they had no 8/4, which I was hoping to find to avoid a glue-up for the legs. That's when I spotted the mahogany. Beautifully clear, 15 foot long lengths, and none of it under 9 inches wide. I inquired about the price; same as the walnut. Surely there was a premium on the wide boards. Nope. Same price per board foot no matter how wide. There was even a piece 23 1/2 inches wide that I opted not to take. Needless to say, right then and there I switched from a walnut desk to a mahogany desk. All the wood I need is in five boards; four of them 4/4 x 15 feet long. The widths are; two 12 inch boards, one 9 inch, and one 13 1/2 inch. The fifth board is 8/4 for the legs. Almost 8 inches wide and 6 feet long. Enough for the legs for this desk and another table or desk down the road.


I've never worked mahogany before and I've never had the opportunity to work with such nice, wide stock. I'm very much looking forward to it. The only thing that I'll have to glue up on the whole piece it the desk top, and that will have only one glue joint. This is going to be strictly a hand tool only project and I can't wait to get started. I think I'll work out a cut list tonight to get the maximum yield and grain match out of my purchase. Much more on this desk to come as I get started on some actual woodworking.

Monday, February 13, 2012

Purty Tools Just Plain Work Better

Well, not really. But they are more enjoyable to use. At least for me. Inspired by the little restored Millers Falls #107 drill I picked up a few weeks ago at the RATS tool sale, I decided to take a shot at doing a little refurb on my Millers Falls No.2. I've had this drill for a while and use it quite a bit. They are very handy for smallish drilling jobs and I highly recommend that you pick one up if you don't have one. The MF No. 2 is one of the more easily found egg beaters, and I believe, one of the better ones.

I didn't do a full on, strip to the bare bones restoration on this one; mainly because I didn't quite know how everything came apart and I didn't want to screw up my perfectly functional drill. I removed the chuck, the main drive gear, and the handles. I stripped painted parts on a wire wheel and sanded the wood the best I could. Then I polished the chuck, the handle arm, and the parts of the main body that were nickel plated. Taped up the rim and teeth of the main gear, and all the parts on the body that didn't get painted and laid on a couple coats of Rustoleum gloss red and gloss black enamel. The finish on the wooden parts were so burnished and hardened from use that I really couldn't get them stripped down as much as I'd have liked so I'm not thrilled with the finish on those. Did the best I could, slapped on a little bit of stain and some clear poly and called it good. It's not on par with the $160 restored ones you find on eBay, but I'm happy with it, it didn't cost much, and it was a fun little project. And I could swear it drills just a little better with a fresh coat of paint.

Since I finished this drill, I came across a write-up that a fella did on one of the forums detailing a fully stripped restoration that he did on a No.2. After picking up a few pointers from him, I think I'll be on the lookout for another candidate to restore, taking the next one all the way. You know, because there's just not enough on my "to do" list now. :)

Anyway, the before and after pics:


Wednesday, February 8, 2012

Book Review: Inspiration-Gene Landon and Seven Hearths

About a month ago, I saw a post on the SAPFM Forum by Tom Meiller about a memorial book he had written on Gene Landon. I didn't know a lot about Mr. Landon, other than that he had taught woodworking at Olde Mill Cabinet Shoppe in Pennsylvania, he was a very respected woodworker, and that he had passed in June of 2011.

I clicked on the link that took to the site where the book was for sale, a print on demand publishing company and saw the price. A bit steep for me at $79.95. I also saw that they had a preview button that you could click on. The 13 or so pages in the preview were enough to convince me that this book was worth taking a chance on. And boy am I glad I did.

I feel this book is worth the price just for the pictures alone. Over 300 by my count, most in color, all beautifully done. The pictures were taken in Gene's home, Seven Hearths, which he built in the 1970's but looks every bit like it was built 200 years earlier. The house is a fantastic backdrop for his amazing furniture. The text is not extensive, but it is well done and gives you a glimpse at what an amazing craftsman and an amazing PERSON that Gene Landon was. He was one of the premier builders of period reproduction furniture and has pieces that he built or restored in museums across the country and even in The White House. One piece he did that I found fascinating was a replica of the rising sun chair in which George Washington sat in during the Constitutional Convention in 1787.

I thoroughly enjoyed this book and I'm sure it's one that I will reference again and again for inspiration and ideas. I came away with am immense respect and admiration for Mr. Landon's work and for who he was as a person. After reading this book, I am saddened that I never had the chance to take a class from this giant of woodworking and just as sad that I never had the opportunity to meet a man who was obviously a very special human being.

Congratulations and kudos to Tom Meiller for a fine job in putting this book together. I only wish that it was available in a leather bound edition, which would be fitting for a book containing these works of art.

Thursday, January 26, 2012

RATS Antique Tool Show Review


This past weekend I attended my first RATS (Richmond Antique Tool Society) Antique Show on the outskirts of Richmond, Virginia. I found out about this show through a post on the SAPFM (Society of American Period Furniture Makers) forum. I went to the RATS website and got a little info about the show and the e-mail address of club president Rick Long. Rick was very helpful in answering my questions via e-mail. The show was about two hours away, but since there was a few things I was looking for, I decided to go check it out on Saturday morning.

The show is actually a large general antique show with about 15 or so tool dealers set up in the middle. I went with the intention of looking for some wooden tongue and groove planes, a nice handled wooden plow, and anything else that looked like it would be at home in my shop. Most dealers had a good selection of tools with them, mostly users, which is what I'm looking for. The prices were pretty decent overall and most of the dealers were willing to dicker. I found a pair of 1/2" tongue and groove planes that were in pretty good shape. They were marked $35 for the pair, I was able to get them for $25. I didn't really find the sweet, primo, handled wooden plow plane but I did find a nice Millers Falls #107 hand drill that someone had restored to like new condition. I didn't really need it but it sure was calling my name. $44.95. Must have picked it up and put it down ten times in the 3 hours I was there. Finally couldn't stand it anymore. Offered $40. SOLD! So, that was my haul for the day. Although I've bought quite a few antique tools off eBay over the years, I prefer tool shows where I can actually pick up the tools and inspect them. A picture on the computer can be quite deceptive. I was pleased with my purchases and am counting the days until the next sale, the annual PATINA auction and sale in March. Time to start saving my pennies.

Oh, I did check out the non-tool antiques while I was there and although I didn't buy anything else, there was some pretty interesting stuff, as the pictures show.


Monday, January 23, 2012

A New and Improved Closet-With a Little Hand Tool Practice Thrown In

So the un-ending home improvement projects continue. This time, a custom closet for my oldest daughter to replace the old wire rack system that was in there. I'm making this primarily out of a sheet of 3/4" oak ply and since I just can't bring myself to cut sheet goods with my hand saws, this would be mainly a job for the table saw. BOOOOO!!! BUT, the face frame is out of solid 3/4" oak, so I thought I'd get some hand tool practice in and do all the joints with hand cut half-laps. YAY for hand tools!!! The half-lap joint is a pretty basic joint in which half the thickness of each piece of wood to be joined, generally at right angles to one another, is removed from the top of one piece and the bottom of another to make a joint that looks like a butt joint, but has more strength.

I built my boxes first out of the plywood and then made the face frame fit the assembled boxes. Nothing exciting here. Rip the plywood on the table saw. Cut the plywood to length on the table saw. Glue, screw, and nail everything together. YAWN! Now for some hand tool action. On to the face frame. First I ripped the rails (the horizontal pieces) and stiles (the vertical pieces) to their proper width and then cut all the pieces to length. When using a half lap joint, all the pieces are cut to the full length of the case piece, as opposed to if you were just using butt joints, in which case you would subtract the width of your stiles from the length of your rails.

I laid the stiles on the plywood boxes and then marked where the top of each rail would be, as dictated by where the shelves were. I put an X on the side of the mark where the waste would be removed and then took the rails and stiles to the bench. A bench hook is a great accessory to have for cutting these joints by the way. Generally on face frames, you want your stiles to look like one unbroken run and your rails to join into these, so the half thickness to be taken away from the stiles will be on the back side. I scribe across the back of the stile 90 degrees to the edge at each of my marks I made earlier using a striking knife. A knife is much better than a pencil in this case as it is more accurate and gives you an edge for your saw to ride on later. I then use the rails themselves to mark the width of the material I'll be removing from the stiles, making a small mark and then squaring up with a square and marking knife again. To mark the depth of the material to be removed, I set a marking gauge to exactly half the thickness of the material and mark this between the width of rail marks I made, always marking from the waste side. Next up is cutting the shoulders on these marks I just made but before I do, to make a cleaner cut, I chisel a shallow groove on the waste side of each line for my saw to register in. I saw down to my depth line on both sides and then chisel out the waste in between. I don't worry so much if I take a little too much material out of the middle as strength isn't really an issue here. To cut the half-lap on the rail all you do is mark the width of the style on the end of the rail, square across same as was done on the stile, mark the depth with the marking gauge on the end and sides of the rail, cut the little groove on the waste side for a cleaner shoulder cut, and then cut the shoulder to your depth mark. Put the rail in a vise and saw down the marking gauge lines to complete the half lap on this end of the rail. I saw on a diagonal part way down, then flip the board and finish sawing from the other side. I also find that it helps to cut a small notch in the corner of the rail to aid your tenon saw in starting the cut. Ok, repeat this process for all your intersecting rails and stiles, glue and nail from the backside and you have a nice half lapped face frame.


I feel like this description has been even more rambling than normal and for this I apologize. Hopefully the pictures will help clear things up a little. Two things I'd like to reiterate though are using a knife to mark a line is usually far superior than using a pencil, and a bench hook is one of your most valuable sawing accessories. Well, time to go. I'm sure there's something around here that needs painting or updating.


Oh, by the way, my daughter is very happy with her new closet arrangement. Much better than the old wire shelving. GO PATS!!!

Monday, January 9, 2012

Woodworking?

Alright, here's the deal. I've been busy with home improvements for the last few months which have kept me out of the shop. Therefore, not many new blog post on Plane Shavings. My mom reads my blog, and for the last month or so I've been hearing "When are you going to post something new on your blog? I'm tired of checking on it and seeing ""Another One for the Till""!" (This was prior to "My Shop in Shambles" post.) So, although not a lot of woodworking here, this one's for you Mom!

We bought a set of four bar stools about three years ago. Nice Windsor-ish style with swivel bases. We've enjoyed these, but over time, the swivel feature had gotten so loose on a few of them that they would swivel and bang against the wall or counter with little more than a breeze, marking the walls and dinging up the bow-back of the stool. So the other day I took one apart to see if the ball-bearing swivel plate was serviceable. I jokingly sat on the base of the disassembled stool and said to my wife, Jen, "All fixed!" Well, she said she'd be fine with that. So after some discussion, we decided I'd make some padded cushions for them and give them a fresh new look. The following pictures are the before, during, and after of the stool transformation.


So, right or wrong, here was my process. I marked off 13" circles on 3/4" ply with dividers and cut out with a jig saw and sanded the edges smooth and slightly rounded. I cut matching circles from a sheet of 2" high density foam and stapled these to the plywood circles around the edges. Then I wrapped this combination in cotton batting, pulling tightly and stapling from one side and then to the opposite side all the way around and trimmed the excess. Next, I wrapped this in a canvass material that Jen and I chose and stapled this while pulling everything tight, pretty much the same way I did the batting. After trimming all the excess canvass material, I placed the cushion face down, centered the upside down stool on it, and drilled and lag screwed through the holes that had previously held the swivel assemblies to the stools and into the plywood base of the cushion assembly. Preformed this entire routine three more times and voila! Four "new" stools and a fresh look for not a lot of money. And no more dinged up walls from swiveling seats.

Not exactly a lot of woodworking there, and definitely not the type of thing that I like to do in the shop and blog about; but when you own a home, these are the things we sometimes must do. Jen's happy with them and if Jen's happy, I'm happy. Right Baby? :)