Sunday, July 24, 2011

A New Saw. And Lots of First.

Well, I finally got this little panel saw done. I actually cut the saw plate out for this way back in September of last year. No sense rushing these things. This is the first panel saw that I've ever made and only the second saw overall. Consequently, it's also the first closed handled saw handle I've made and the first lambs tongue I've carved. All in all, I'm pretty happy with the way it turned out.

The saw plate started off as a piece of .032" 1095 spring steel from McMaster-Carr. I made a cardboard pattern of the shape and size I wanted the plate to be (pretty much like the Kenyon saw in the Seaton chest) and transferred this to the spring steel. Then I cut the plate to size on the metal shear at my work and then snipped around the toe til it was close and then filed to final shape. Don't ask me what I was thinking when I filed in the nib. Not the traditional placement I know. I'll just call it my signature look.
I brought the plate home and hand filed the teeth in the plate at 10 TPI using a pattern that I made on Exel, printing that out and using that as a guide for the tooth spacing.
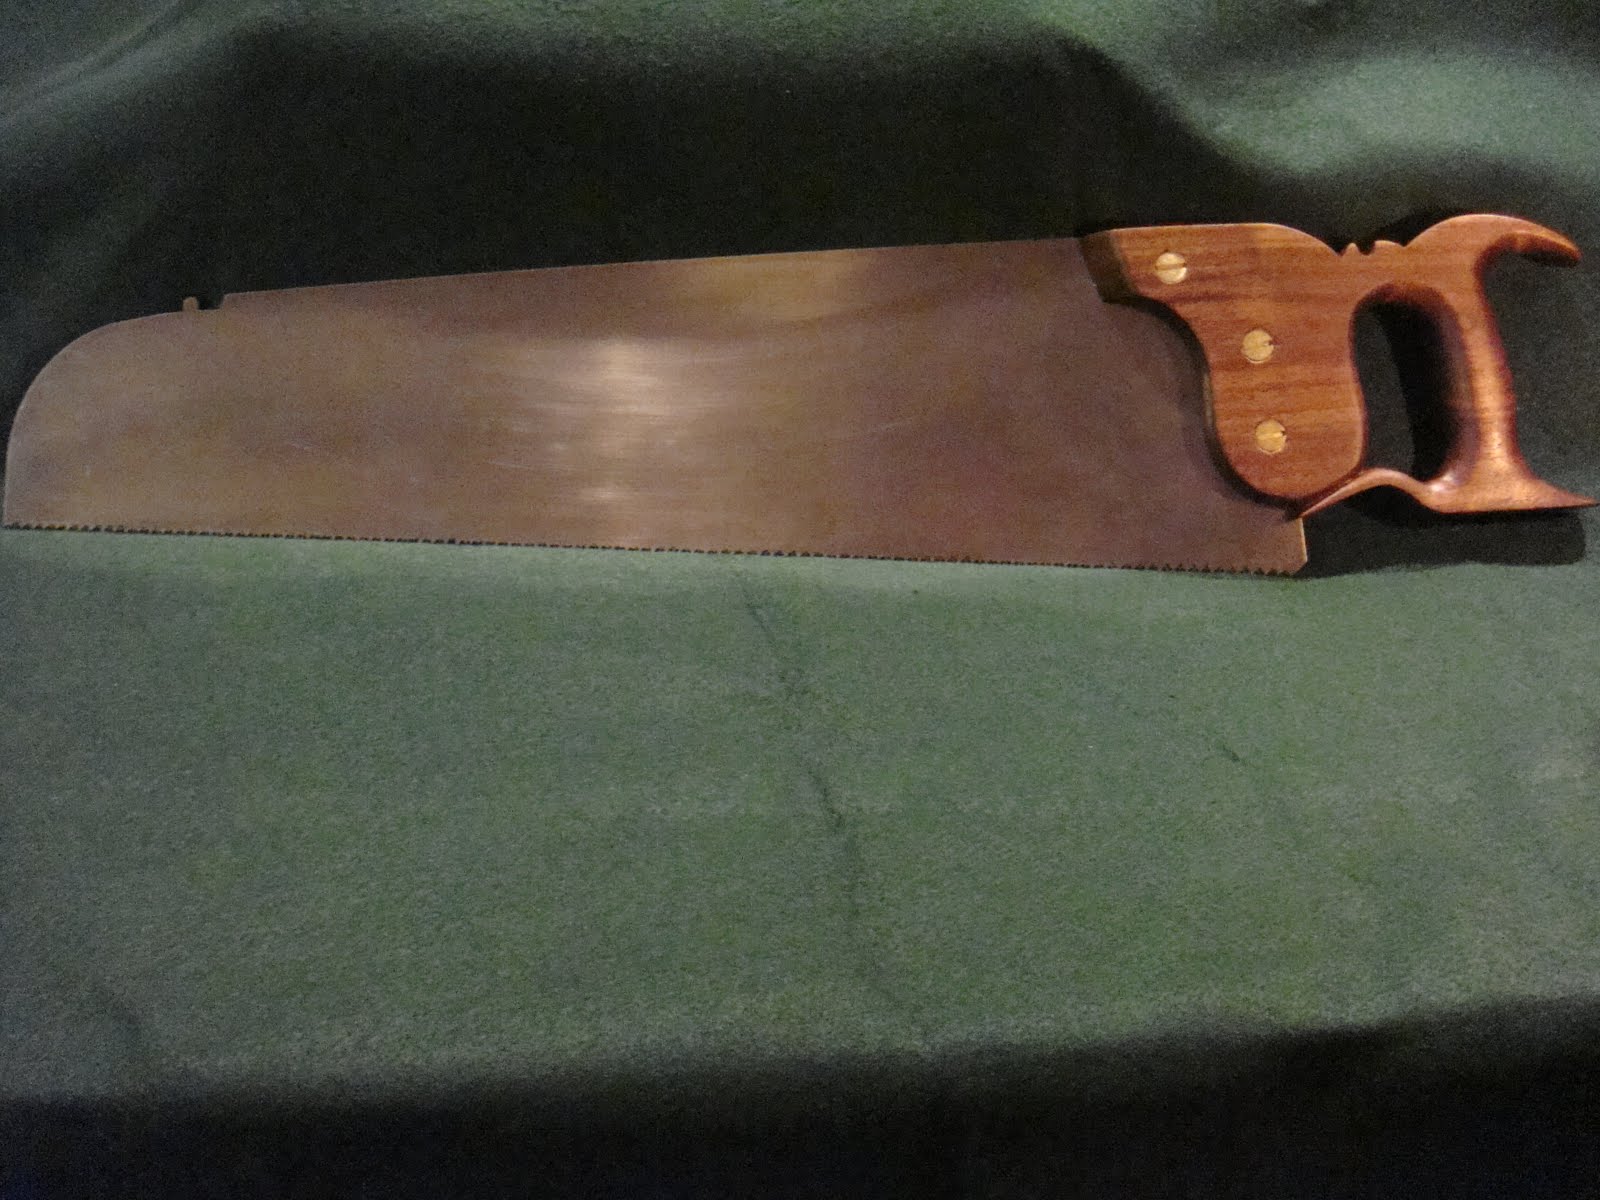
That's pretty much where I left things until about a week ago when I got a wild hair and decided it was time to finish this thing. I drew up a pattern for the handle from looking at pictures of the saws in the Seaton chest on-line and in the book "The Tool Chest of Benjamin Seaton". The handle is black walnut that I had in the shop. I used my sash saw, and a coping saw to rough it out and the shaping was done with gouges, chisels, and rasp and sanded smooth with sand paper. The lambs tongue was just shaped with a v-gouge and a chisel. Wasn't nearly as tough as I thought it would be.

For hardware, I just used 1/4-20 straight slot counter sunk brass screws and brass square nuts. The square nuts were mortised into the right side of the handle and filed and sanded flush before the handle was finished. To finish the handle, I started off with two coats of Watco danish oil. This just left the wood looking dull and blah so I went and bought some Formby's low gloss tongue oil finish. Three coats of this, sanding with steel wool in between and a steel wool scuff up after the final coat to take some of the shine off and I called it done. While one of these coats was drying, I removed the bluing that was on the spring steel using citric acid. This was the first time I'd used this method and I was impressed with how quickly it worked. Less than 2 minutes and all the bluing was lifted right off.
I have lots to learn when it comes to saw sharpening, but I sharpened and set the teeth the best I know how and she cuts pretty good. Here's some test cuts. Nice thin kerf with no binding and a fairly smooth cut.

Hopefully as I learn more about sharpening she'll just cut smoother with every touch up.
I'm really finding myself enjoying the tool making aspect of this craft. There's nothing quite like using a tool that you actually made yourself. Now maybe I can use this new saw to cross cut some oak to size for the skirt on my still unfinished tool chest.
Oh, and I just got in some O-1 tool steel with which I'm going to try my hand at making some 18th century style square sided firmer chisels. Hopefully I'll get a chance to start on these soon.

Friday, July 8, 2011

Removing Rust with Vinegar-Mixed Results

A few weeks ago I went to a local estate sale and picked up 2 pair of Starrett dividers and a pair of Lufkin outside calipers. They were pretty rusty but the price was right, $15 for all three, and they were good brand name tools so I picked them up. You can never have enough dividers as far as I'm concerned. I'm starting to really see their usefulness in transferring measurements and laying out dovetails, among other uses. They're pretty cool tools and you can usually pick up vintage ones at a reasonable price. I could see myself developing a divider "problem" in the future.

Anyway, I was reading a post on WoodNet the other day where they were discussing de-rusting tools with citric acid. Vinegar was also mentioned as a good way to remove rust from tools. Hey, I have some rusty tools. AND Ihave some vinegar. Sounds like it's time for a little chemistry experiment. Well, I think I'd give myself a B- or a C in THIS Chem class. I'll let the pictures do the talking.

Before:

After:

As you can see, the 10" dividers didn't fare so well. Cleaned up nicely, but I guess I left them in a little too long. From what I understand, vinegar removes the rust, but also eats away the good metal if the tool is left to soak to long. Hopefully I can find a spring to replace the broken one on the 10" dividers.

Other than that little snafu though, I'd say I was impressed with the de-rusting ability of plain old white vinegar. Just a very little bit of wire brushing after a soak and things cleaned up almost like new. If you try this, just remember to immediately blow the tools off to remove the water that you rinse the tool with. I used an air compressor but you could use a hair dryer also. After I blew them off I sprayed them down with WD-40 for good measure. All and all, even with the little mishap, not bad for $15.

Wednesday, July 6, 2011

Just Piddling in the Shop


Well, it's back. Seems I've been stricken by another case of WWADD (Wood Workers Attention Deficit Disorder). With a tool chest sitting by my bench just begging to be finished and two panel saws and 4 back saws in various state of incompletion, it would only stand to reason that with the little bit of shop time I've had lately that I would work on building some wooden squares. I don't know why, other than the fact that I think they're pretty cool. Well, that and the fact that I've been watching Bob Rozaieski's pod-cast a lot lately and the episode on wooden squares caught my attention. If anyone reading this (IS anyone reading this?) hasn't been to Bob's site, do yourself a favor and check it out. He probably has the best, most informative blog going when it comes to hand tool woodworking. And his pod-cast are fantastic. He is doing the woodworking community a great service with his site.
Now, about these squares. The miter square is made from walnut with oak dowels pinning things together at a 45* angle. I cut the bridle joint with a small tenon saw and chiseled out the waste with a mortise chisel and then refined it by paring away at whichever side of the bottom of the bridle needed material removed to get my 45* angle. I established a true 45* angle on a test board by basically using this method. One more reason that dividers are one of the most valuable tools in the shop. When you strike these lines on your test board, I recommend that you use a knife rather than a pencil. A knife leaves a much more precise line.
The two try squared are made from beech with walnut dowels pegging things square. These squares started out as a piece of 1 3/4" x 1 3/4" beech, 18" long. I marked a line about 7/8" on the edge of the beech for the stock and ripped it with my D-8 rip saw, making sure when I marked it to orient things so that I'd wind up with quarter-sawn wood, much more stable. Then I took the remaining length of wood and ripped that in half for the blades. I planed the 7/8" stock down to about 3/4" and then made both edges square to the face and cut this into the lengths I needed for my two stocks; in this case 10" and 6". Next I cut the cheeks of a 1/4"wide bridle joint as I did with the miter square and then planed the blades to thickness to fit in the joint. Then it was a matter of squaring the blade to the stock using the same test board I'd used for the miter square and truing it to the 90* line that was established in the process of finding the 45* angle. If you're square to this line, flip the stock 180* so that the blade is on the other side of the line and if you're still square to the line, your square is actually square. At this point it's time to glue the blade into the bridle joint in the stock and let it set for a few hours. Then come back and drill holes for the dowels and glue those in. Once the glue set on these I pared away the excess with a sharp chisel and cut the decorative ends on the stock and the blade. This was traditional on craftsmen made 18th century squares. Made a few passes with a smooth plane to dress everything up nice and then I just finished with a few coats of danish oil.
I'm happy with the way these turned out and I think I'd like to make one more, maybe about a 4" or 5" version of the try square. The two I've made so far are a 15" and a 9" blade length. These are fun to make and really not that complicated and they'll serve you well for many years. And I always get so much more satisfaction using tools that I've made when I'm working on a project. Now I just need to find time to put them to use on some of these incomplete projects around the shop.